
How We Carved the Octagonal Tower Pendant
Here's a summary of the work that went into this timber up to this point:
 1. Find a large tree that feel in the ice storm, cut the stump from the fallen tree (careful not to let the stump roll down the hill onto you when it comes free of the tree), hook the tree to the bull dozer, pull it off of a steep hill to a loading site, cut it into 8' to 20' lengths, load it onto the log truck, drive it out of the woods, unload it at the saw mill, cut it to log lengths.
2. Put the log on the Woodmizer saw mill, cut it into an octagonal shape 14.2" in diameter using 45 degree wedges to hold it in place, plane it with a 12" electric planer to 14" diameter exactly. (flat side to flat side diameter).
3. Take the clamp off of the chain mortiser (it will not clamp 14" octagonal timbers!), use ratchet straps to hold the chain mortiser to the timber, cut 8 mortises in the top of the timber for the tenons on the upper ends of the 8 hickory rafters, cut 8 mortises (with housings) into the midsection of the timber for the 8 walnut rafter ties that will join this octagonal king post. Test fit at least one rafter and one rafter tie to make sure you got the math right!
At this point, we took a deep breath and planned our next moves carefully, since we now had at least 30 man hours in this piece of wood. Starting fresh one Saturday morning, my brother-in-law and I began working on the pendant. Fearing that we might screw up... or encounter a bug hole or knot inside the wood that would ruin the pendant, I decided to start an extra 6" down on the timber, thereby giving us a chance to start over if anything went wrong.
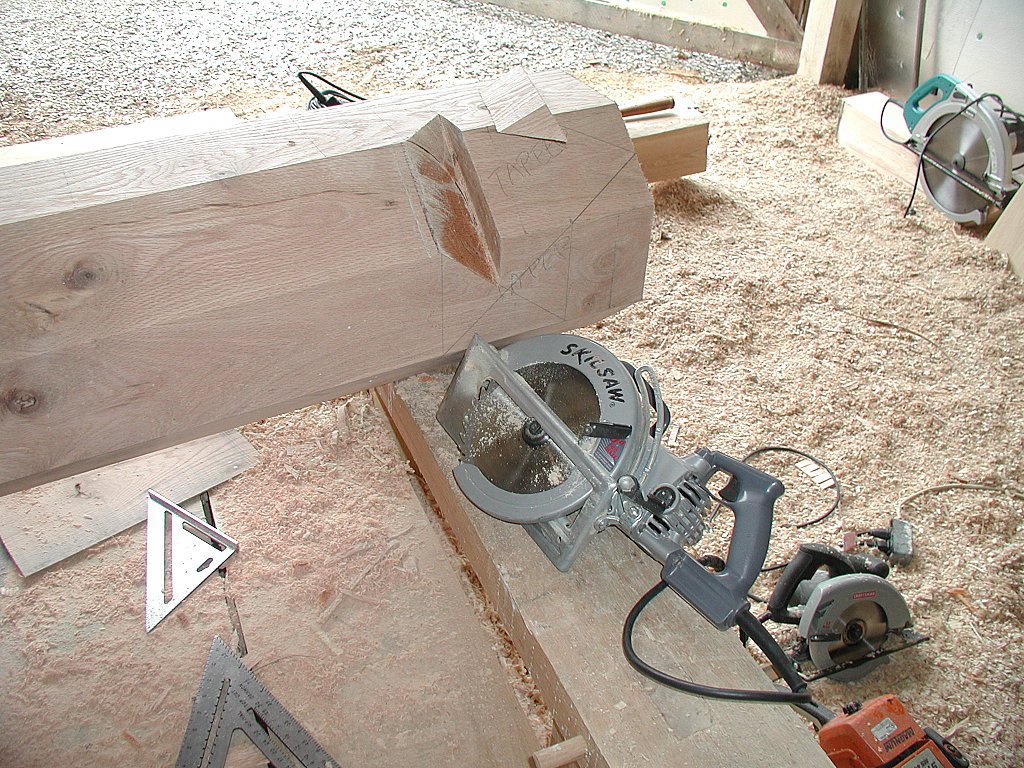
 The first thing I did was to draw the profile lines that would define the pendant on the the timber. Unlike all of our other saws, our worm drive saw would adjust down to 30 degrees, so we used the worm drive saw to cut the first 3" inches of the pendant. I made 8 cuts at 30 degrees (rotating the timber 8 times) and then 8 cuts at 90 degrees (rotating the timber 8 more times). Some very interesting chunks of woods fell to the ground and we were left with the beginnings of our pendant.
 Now things got trickier and trickier. :) We decided to approach the piece of pendant with the ol' "kerf and chisel" approach. That is, kerf the wood across the grain using a saw and then chisel out the blocks, taking advantage of wood's weakness along the grain. This worked pretty well for us, and we used the slick (a giant chisel - I bought mine for $85 at an antique store in New Hampshire) to progressively refine the shape until it was pretty smooth. Even using the 16" Makita beam saw, we were only able to kerf deep enough to carve the next 6" of the pendant this way.
 If we were willing to use the hand saw, to make several more 6+" deep cuts in this piece of oak, we could have carried on with the kerf-and-chisel approach. We started to try that, but we were getting tired, and our confidence was building, so I looked to the Stihl chainsaw and a light bulb went on. Could I hold the chain saw steady enough to reasonably approximate the rest of this pendant? It was a big gamble, but I did it anyway. The first 2 cuts left us with something that resembled a hammer-head shark. The remaining 2 cuts left us with a 4 sided pendant appended to an 8 sided pendant. Feeling I had pushed my luck far enough, I made only 4 orthagonal cuts with the chain saw (not 8), careful not to cut any part of the wood that would eventually be part of the pendant. Having removed the bulk of the wood with the chainsaw, it was not difficult now to use the slick to hand carve the remainder of the pendant point.
 No doubt, the pendant looked pretty nice at this point, but there was one face of the pendant that had a knot in it, and that knot gave us a very hard way to go with the slick. The results were a little rough - and looked beyold the help of 80 grit sand paper. Emboldened by my success with the chainsaw, I decided to try free-handing the 12" makita planer across one of the pendant faces. (upper left picture) The results were astounding. In the upper right picture, you can see that I have planed 7 of the 8 sides, taking a picture of the 8th side just before planing so I could show you the difference the planer makes. In the lower left picture, it is obvious that caution had long since been abandoned, and the planer ate my shirt, and nearly pulled me in with it before my brother in law pulled unplugged the cord. (Which reminds me to remind you - I am not recommending that you attempt any of these steps at home - in fact, I recommend against it. The safest thing would be to stick with a hand saw, a chisel, and sand paper.) In the lower right picture, you can see the final result - it far exceded my expectations. (maybe in a year or two, I can take a picture of this pendant after the wood has dried and cracked!)
 Having gotten the most difficult part of the pendant out of the way, we moved on to the collar or shank of the pendant. Using the 16" Makita circular saw (we call it the pizza saw in reference to the blades uncanny size relationship to a large pizza) set to 45 degrees, I made 16 cuts, then turned the saw back to 90 degrees and made 16 more cuts. Whew - very tiring, even with a power tool. But finally, several blocks of wood fell to the ground and the collar of the pendant began to take shape. Now what to do with the solid two inch disk-like shape of wood that was left? In my sketches up until this point, I had always planned to remove all of this wood, leaving a flat, straight shank. But now that I was faced with removing all of this wood, a light buld went on. "Once I remove the wood, its gone forever... but while it's there I could try carving a more interesting shape into it... and if I screw up, just remove the wood like I had planned to do."
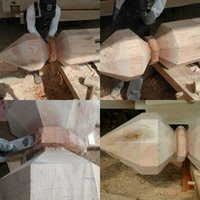
Using the kerf-with-saw and chisel approach, we removed the bulk of the wood in the collar until we had whittled the octagonal-disk-like shape into a smaller octagonal-disk-like-shape. Then, we chiselled the corners of this octagonal shape. Being green, this wood was pretty easy to carve. Notice the color of the wood, where the wood has been recently cut - very red - you could actually see water coming out of the wood as we chiselled it. Eventually we ended up with a pretty neat shape and called it "done". This roundy-octagonal collar was just what the pendant needed. To my eye, the final pendant looks like a cross between a diamond and an acorn - very appropriate for our house (full of metaphors!).
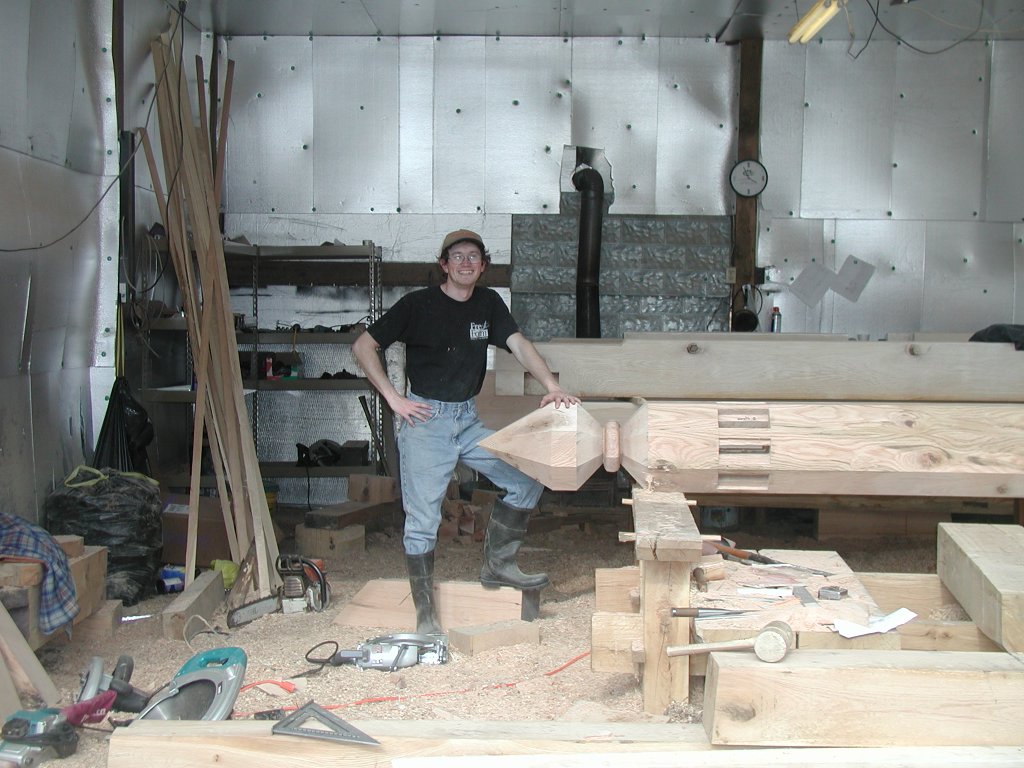
 Here's a picture of me - happy with the final result- and looking very cool with my cow-manure-wading boots. (look on the ground... you could subtitle this blog entry - how to use every tool you own on a single piece of wood)
 1. Find a large tree that feel in the ice storm, cut the stump from the fallen tree (careful not to let the stump roll down the hill onto you when it comes free of the tree), hook the tree to the bull dozer, pull it off of a steep hill to a loading site, cut it into 8' to 20' lengths, load it onto the log truck, drive it out of the woods, unload it at the saw mill, cut it to log lengths.
2. Put the log on the Woodmizer saw mill, cut it into an octagonal shape 14.2" in diameter using 45 degree wedges to hold it in place, plane it with a 12" electric planer to 14" diameter exactly. (flat side to flat side diameter).
3. Take the clamp off of the chain mortiser (it will not clamp 14" octagonal timbers!), use ratchet straps to hold the chain mortiser to the timber, cut 8 mortises in the top of the timber for the tenons on the upper ends of the 8 hickory rafters, cut 8 mortises (with housings) into the midsection of the timber for the 8 walnut rafter ties that will join this octagonal king post. Test fit at least one rafter and one rafter tie to make sure you got the math right!
At this point, we took a deep breath and planned our next moves carefully, since we now had at least 30 man hours in this piece of wood. Starting fresh one Saturday morning, my brother-in-law and I began working on the pendant. Fearing that we might screw up... or encounter a bug hole or knot inside the wood that would ruin the pendant, I decided to start an extra 6" down on the timber, thereby giving us a chance to start over if anything went wrong.
 The first thing I did was to draw the profile lines that would define the pendant on the the timber. Unlike all of our other saws, our worm drive saw would adjust down to 30 degrees, so we used the worm drive saw to cut the first 3" inches of the pendant. I made 8 cuts at 30 degrees (rotating the timber 8 times) and then 8 cuts at 90 degrees (rotating the timber 8 more times). Some very interesting chunks of woods fell to the ground and we were left with the beginnings of our pendant.
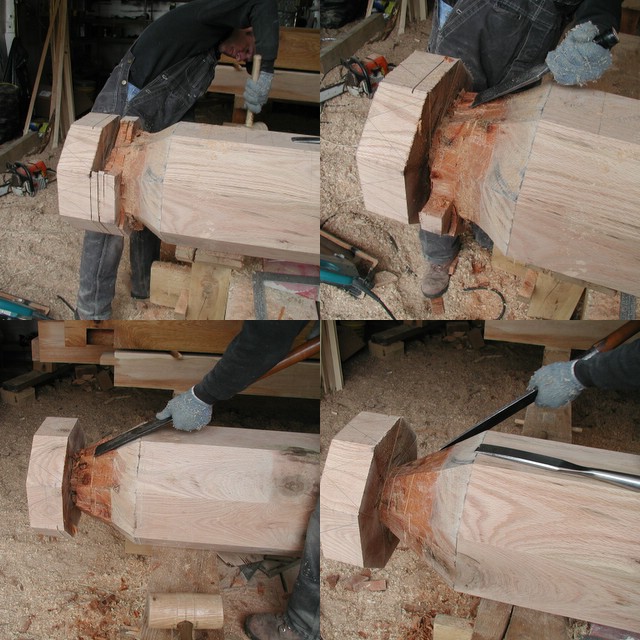 Now things got trickier and trickier. :) We decided to approach the piece of pendant with the ol' "kerf and chisel" approach. That is, kerf the wood across the grain using a saw and then chisel out the blocks, taking advantage of wood's weakness along the grain. This worked pretty well for us, and we used the slick (a giant chisel - I bought mine for $85 at an antique store in New Hampshire) to progressively refine the shape until it was pretty smooth. Even using the 16" Makita beam saw, we were only able to kerf deep enough to carve the next 6" of the pendant this way.
 If we were willing to use the hand saw, to make several more 6+" deep cuts in this piece of oak, we could have carried on with the kerf-and-chisel approach. We started to try that, but we were getting tired, and our confidence was building, so I looked to the Stihl chainsaw and a light bulb went on. Could I hold the chain saw steady enough to reasonably approximate the rest of this pendant? It was a big gamble, but I did it anyway. The first 2 cuts left us with something that resembled a hammer-head shark. The remaining 2 cuts left us with a 4 sided pendant appended to an 8 sided pendant. Feeling I had pushed my luck far enough, I made only 4 orthagonal cuts with the chain saw (not 8), careful not to cut any part of the wood that would eventually be part of the pendant. Having removed the bulk of the wood with the chainsaw, it was not difficult now to use the slick to hand carve the remainder of the pendant point.
 No doubt, the pendant looked pretty nice at this point, but there was one face of the pendant that had a knot in it, and that knot gave us a very hard way to go with the slick. The results were a little rough - and looked beyold the help of 80 grit sand paper. Emboldened by my success with the chainsaw, I decided to try free-handing the 12" makita planer across one of the pendant faces. (upper left picture) The results were astounding. In the upper right picture, you can see that I have planed 7 of the 8 sides, taking a picture of the 8th side just before planing so I could show you the difference the planer makes. In the lower left picture, it is obvious that caution had long since been abandoned, and the planer ate my shirt, and nearly pulled me in with it before my brother in law pulled unplugged the cord. (Which reminds me to remind you - I am not recommending that you attempt any of these steps at home - in fact, I recommend against it. The safest thing would be to stick with a hand saw, a chisel, and sand paper.) In the lower right picture, you can see the final result - it far exceded my expectations. (maybe in a year or two, I can take a picture of this pendant after the wood has dried and cracked!)
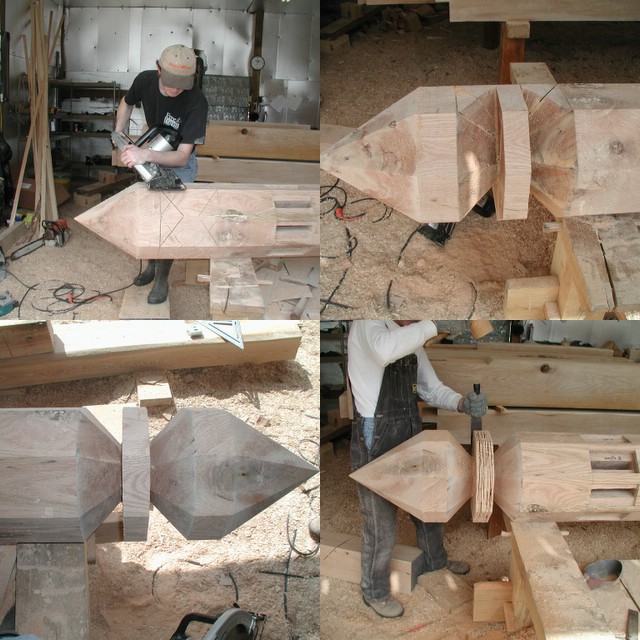 Having gotten the most difficult part of the pendant out of the way, we moved on to the collar or shank of the pendant. Using the 16" Makita circular saw (we call it the pizza saw in reference to the blades uncanny size relationship to a large pizza) set to 45 degrees, I made 16 cuts, then turned the saw back to 90 degrees and made 16 more cuts. Whew - very tiring, even with a power tool. But finally, several blocks of wood fell to the ground and the collar of the pendant began to take shape. Now what to do with the solid two inch disk-like shape of wood that was left? In my sketches up until this point, I had always planned to remove all of this wood, leaving a flat, straight shank. But now that I was faced with removing all of this wood, a light buld went on. "Once I remove the wood, its gone forever... but while it's there I could try carving a more interesting shape into it... and if I screw up, just remove the wood like I had planned to do."
Using the kerf-with-saw and chisel approach, we removed the bulk of the wood in the collar until we had whittled the octagonal-disk-like shape into a smaller octagonal-disk-like-shape. Then, we chiselled the corners of this octagonal shape. Being green, this wood was pretty easy to carve. Notice the color of the wood, where the wood has been recently cut - very red - you could actually see water coming out of the wood as we chiselled it. Eventually we ended up with a pretty neat shape and called it "done". This roundy-octagonal collar was just what the pendant needed. To my eye, the final pendant looks like a cross between a diamond and an acorn - very appropriate for our house (full of metaphors!).
 Here's a picture of me - happy with the final result- and looking very cool with my cow-manure-wading boots. (look on the ground... you could subtitle this blog entry - how to use every tool you own on a single piece of wood)
posted by Thomas Massie at Sunday, February 06, 2005
![]()

0 Comments:
Post a Comment
<< Home