
West Side Story
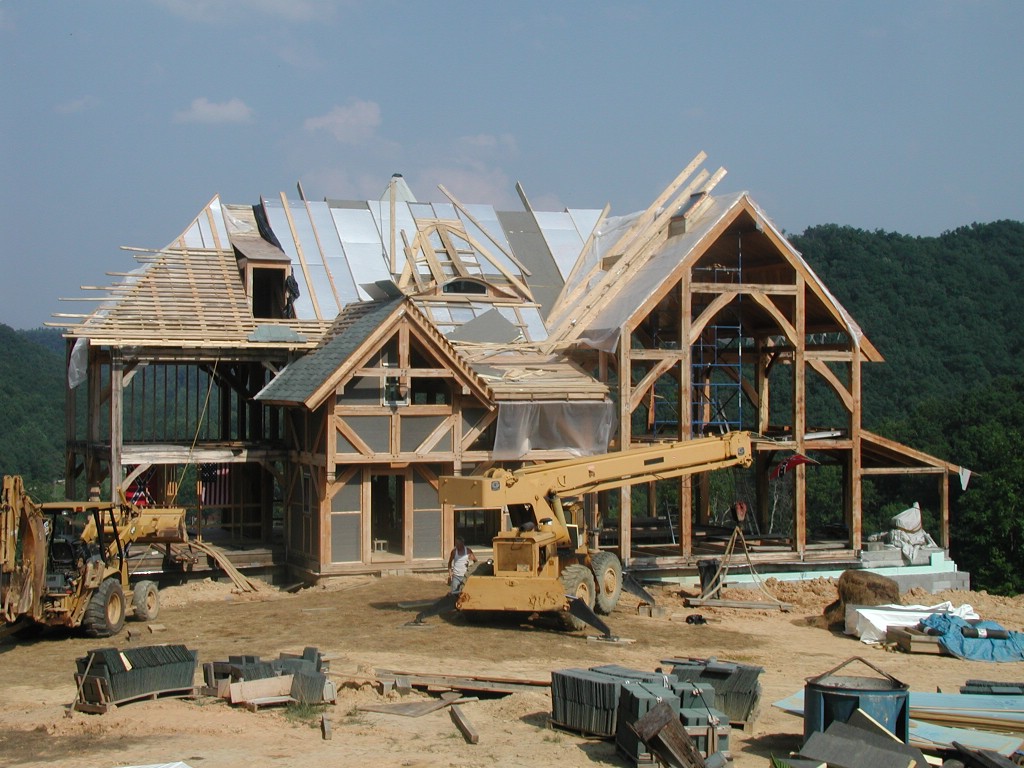 There are so many things going on with the west side of the roof right now that I thought I'd just take a picture of the whole scene. Today, two of my wife's brothers installed the first of three skylights into the roof structure (right side of picture). It took them about an hour to decide to throw away the installation manual (one of those freaking tri-lingual deals), and after that, things went pretty smoothly. Actually, I think it was an all-day struggle, but they got-er-done. They hooked the skylight to the generator and tested the remote control open/closing feature, the automatic water-sensing closing feature, and the blinds. Just before they installed it 32 feet above the great room, my wife realized that the time to stain the wood frame was _now_, so she slapped a coat of stain on it. Just-in-time-staining means that my brother-in-law's finger prints are now imortalized in the window frame, but who's going to notice? The window is a Velux brand skylight, and we were all amazed at the engineering and build quality of their product (trilingual manual notwithstanding!).
On the low-tech side of things, I went into the woods today with "S" (please, let's just call him "S" for now - you wouldn't believe his real name!) with the John Deere 750B dozer and snaked out three white oaks and a yellow poplar. These were trees that I discovered yesterday while (successfully) hunting for Chantrelle's and Oyster Mushrooms. The poplar must have fallen in the past 6 months, because I found it laying across the road that goes up the middle of the holler. Two of the white oaks were trees that I had staged in the woods after the ice storm, but had completely forgotten about (they were _deep_ in the holler). The third white oak was a standing dead tree that I cut today because my dozer has 4 chokers and I didn't want to skid out only three trees. We took most of the logs to my saw mill and started making more 3x3's (for the "subfloor") and 1x4's (skip-sheeting slate nailers for the roof). The sap-wood in the white oaks was completely rotten, but on mature white-oaks, the sapwood is only about 1" to 1.5" thick, so the logs we cut made plenty of perfectly sound heart-wood lumber.
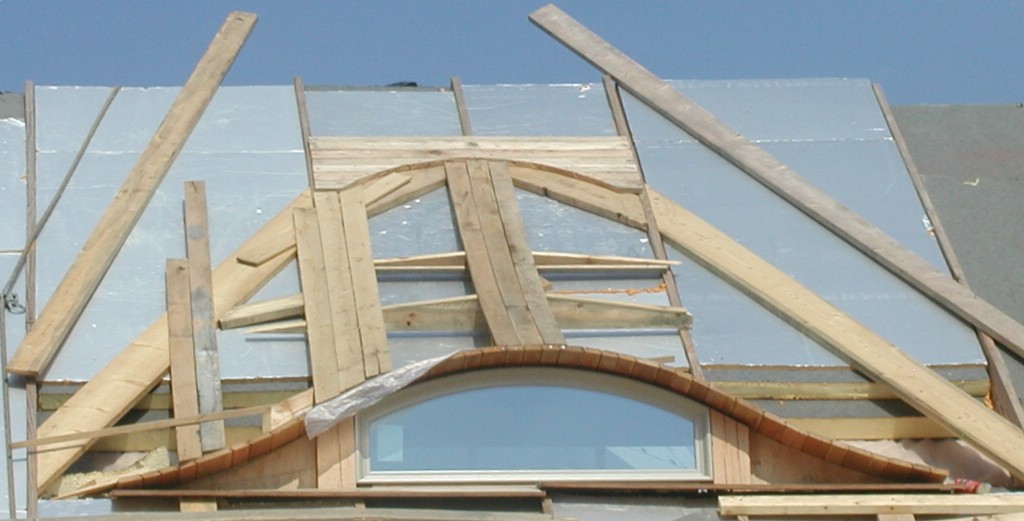 On the west side of the roof, you can see some other things going on (or not going on!)... for instance, I've pretty much stalled on the framing of the outside of the eyebrow dormer. The inside was a piece of cake compared to this. The eyebrow dormer deserves a chapter, but I don't know how the story's going to end, so I don't want to get it started. Some of the difficulties that I've run into are "how to deal with the 10 inch thick roof" and "how to get the boards to lay flat on both the main roof and the eaves of the eyebrow." I think I've solved the first problem by building a shelf into the roof, just below the eyebrow dormer, and I'm dealing with the second problem by using 1/2" green oak boards instead of 1" dry oak boards... the boards must twist in order to fit!. "I'm trying to match 5 dimensional tangency conditions while maintaining continuous first and second derivatives."
 In this picture, you can see we're proceding with the 1x4's, and I've put down a little more slate on the roof. If you look closely at the bottom of the picture, you can see the stainless step flashing that we fabricated. A metal-supply house sold me precut 12"x6" pieces of 20 gauge stainless steel and my brother-in-law took them to his friend (who happens to be a dirt-track race-car fabricator) and bent them on a heavy-duty brake. A run-of-the-mill aluminum roofing brake will not bend stainless (been there, tried that). Yes, I'm installing step flashing next to a wall that does not yet exist. (more on that problem in the next paragraph!)
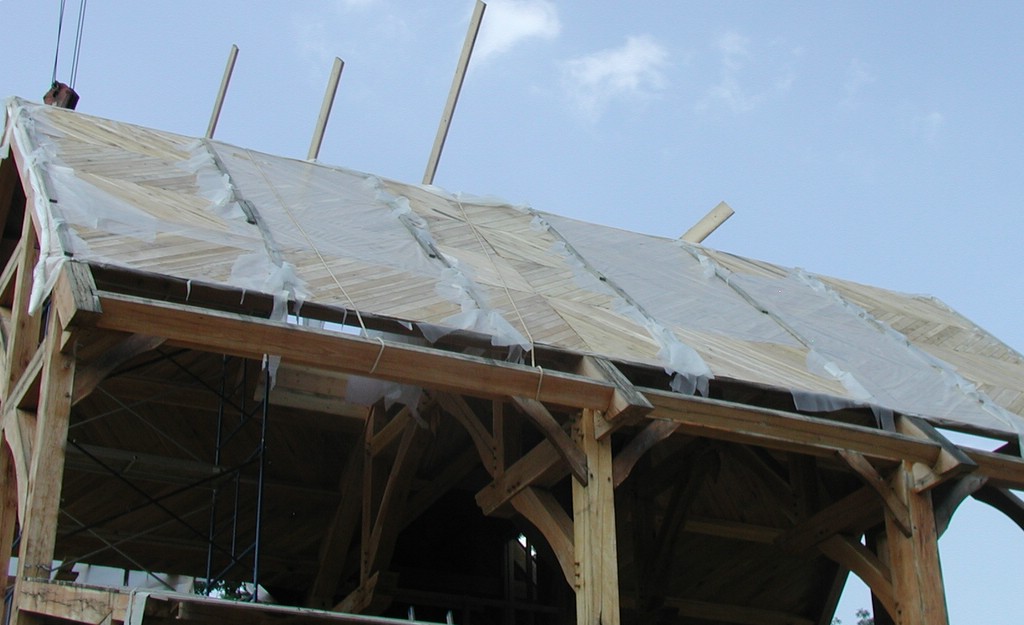
The leftmost dormer (also shown in the picture) looks like a shed dormer, but that's only temporary. We're waiting on the SIPs to arrive before we can frame the dog-house on top of this particular dormer. In fact, that's the big story of this project right now - WE'RE WAITING ON THE SIPs which are being manufactured in Indiana as I type this (I hope!). We are really shooting ourselves in the foot by trying to roof this house without the SIPs attached to the timberframe. The overhang of the finished roof will preclude the use of the crane when it comes time to install the panels. But I've got to get started on the roof, because my temporary roof (and permanent vapor barrier) has been baked by the sun and just last week spontaneously disenegrated into thousands of pieces, thereby exposing my prefinished tongue and groove. Egads, just look a the picture. I'm trying to take some comfort in the fact that it looks worse than I want to believe it is. It was the SIP company that suggested I could go ahead and install my tongue and groove ceilings and put down the vapor barrier as temp roofing until the panels arrived. But I'm the goof-ball who listened and thought it was a good way to keep the project moving. I wouldn't recommend this approach (putting on your t&g without the wall panels already on site) to anyone.
Specifying and receiving the Structural Insulated Panels (SIPs) has been a slow process, and I'm starting to think it's not the silver-bullet for timber frames that the Timberframe/SIP industry proports it to be. (at least not for owner-builders) By contrast, the infill section (site built) of our timberframe went blazingly fast and cost a lot less. But the jury is out on this... I'll wait for the SIPs to arrive before giving my final opinion on "the best way to enclose an owner-built timberframe house."
So that's where we are. Jumped the gun on the tongue and groove, vapor barrier disengrated, knowingly shooting ourselves in the foot by putting on the roof now, still going in the woods to get wood, waiting on walls to show up. But we're still having fun!
posted by Thomas Massie at Tuesday, July 25, 2006
![]()

0 Comments:
Post a Comment
<< Home