
Flashing for Slate
 Contrary to what you might have heard, basic slate roofing is not hard to install. If you were slating a barn, with no gables or roof openings, the work would go fairly quickly. On the other hand, cutting and installing slate at the valleys is tedious work.. and the flashing is especially onerous. The first picture shows a piece of (continuous) stainless valley flashing that we made and wove into this slate valley. The roof to the right of the flashing intersects both the main roof (to the left of the flashing.. not yet slated) and the wall of the main house (not shown in this picture). If reading that was confusing, then you already know what I'm up against.
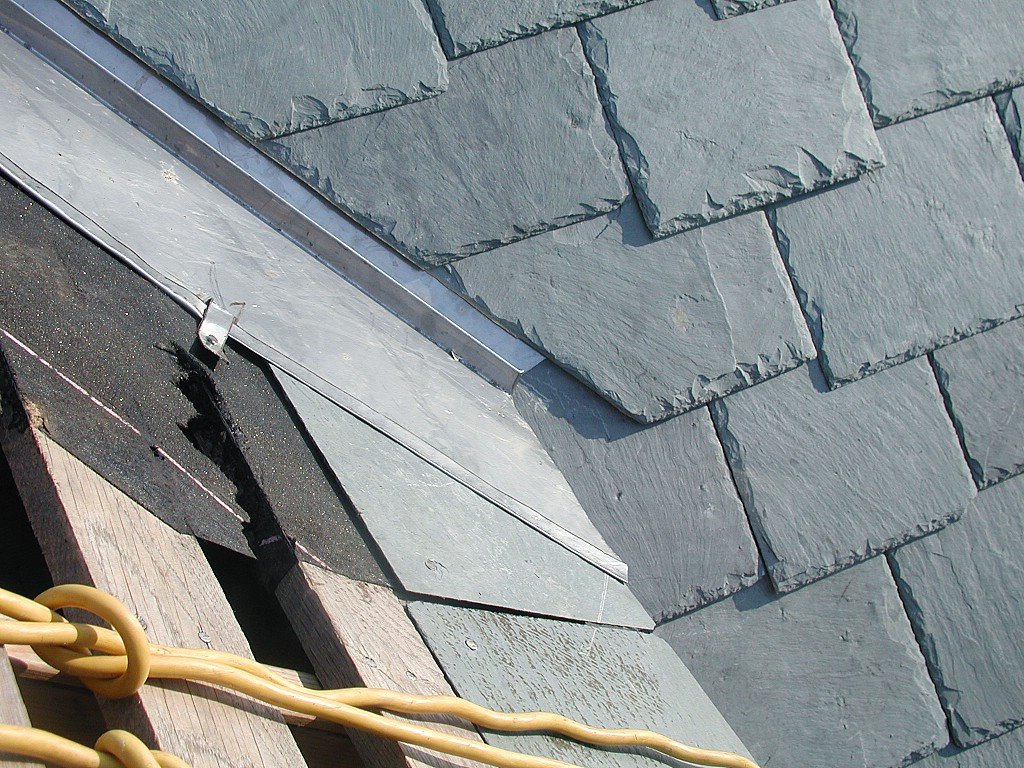
To avoid nailing through the valley flashing, we made little "cleats" that hook on to the lip of the valley flashing and nail into the oak battens (with stainless nails). To avoid corrosion between disimillar metals, we put some sticky tar paper down over top of the (non stainless) nails that hold the oak battens on to the roof. (If two different types of metal touch, a reaction can occur that corrodes one of the metals)
There's also a hidden piece of stainless flashing, woven beneath the course of slates where the water from the flashing will shoot out of the flashing and on to the slate roof. I was afraid that the fast moving water could flow sideways under the slate and run through the nail holes in the slate, so I slid a piece of "bib" flashing between the courses of slate there.
 Stainless flashing will last longer and is cheaper than copper. But copper looks better and is easier to cut and bend. So, anywhere the flashing will be readily seen, I'm using copper flashing. In this (second) picture, you can see where I'm using copper valley flashing. Copper was a natural choice here, because the other side of the valley will have copper shingles.
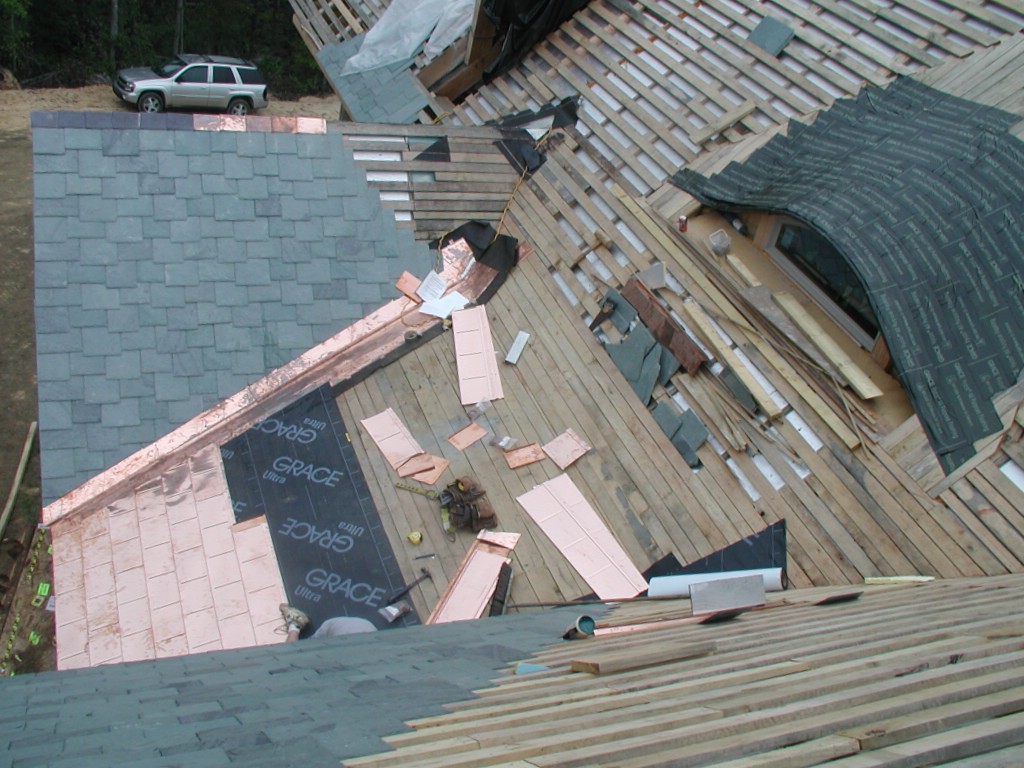
This second picture also shows the copper ridge cap that I've been using. (Note the first 6 pieces of ridge cap have been on the roof for over 6 weeks and have already lost their shiny penny look, but they match the slates even better now that they've weathered a bit). These copper ridge caps are wonderful if you are doing a slate roof and want easy ridges that will definitely shed water. The lip on the first copper ridge cap locks over the end of the gable slates. Then you nail the other end of this first copper ridge cap. (predrilling the slate is a good idea because the nails will have to go through the top row of slates). The lip on the second piece of copper ridge cap locks into a fold on the first piece of ridge cap and covers up the nails that hold the first piece of ridge cap. Nail the second ridge cap, and fasten the third ridge cap to the second, etc. etc. etc. I have two books on slate and neither describes this type of ridge cap, but I love it because there are no exposed nails. You can buy these ridge caps (as well as copper shingles) at Paradigm Shingles.
 In the last picture, you can see where we've started to lay copper shingles. Fortunately I bought these last year, before copper prices jumped again. At that time, the shingles were about $500 per square, now they're over $700 per square (twice the price of slate). Like slate, these shingles go on quickly when you have no gables, eaves, or valleys to worry about. The devil is in those details. The shingle manufacturer makes things a little easier on you by providing valley, drip-edge, and rake pieces that the shingles lock into, but each shingle must be cut and bent in order to fit into these custom pieces, and this requires patience and time (but no specialized tools).
For the most part, I've avoided using asphalt impregnated tar and "Ice and Water Shield" underlayments. Sticky tar paper is an added expense, it can be messy, it's another thing to help your house burn, it smells when it gets hot and off-gasses, and it probably won't last nearly as long as the copper and slate above it. With all that said, I've hedged my bets and decided to use it on the eyebrow dormer, and this fairly flat shed roof (the one with copper shingles).
posted by Thomas Massie at Monday, August 21, 2006
![]()

3 Comments:
Hello. I've been following your progress. Very fun, but looks like a lot of work. BTW, what do you do to "weather in" your project in between rain storms?
Great post on slade roofs. Looking forward to seeing the finished top.
Thanks Chuck!
Anonymous, yes, this is a lot of work. We haven't really been weathering in the house - it's riding in the elements for now. The frame is very robust - especially the oak. Just before we put down tongue and groove ceilings, and covered that with vapor barrier (6 mil plastic), we "Restored" the 3rd floor timbers. To get them back to their clean, bright look (they had weathered a dull gray), we used a wood bleach available from Lowes (I think it might be the same chemical as pool shock). After a "wash, scrub, rinse" cycle with the bleach, we recoated them with linseed oil and they look just fine. Where the vapor barrier has allowed water to come in (through nail holes and seams), the pre-finished tongue and groove has definitely suffered. I'm hoping we can restore it too. So, this house is a building project and a restoration project, because the building part is taking so long!!!
Post a Comment
<< Home