
More SIPs go on
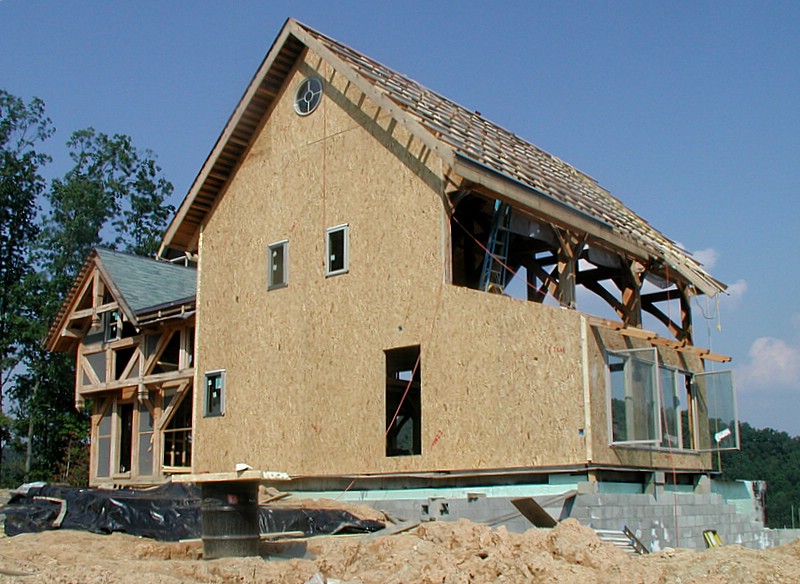 As we get underway with the SIP installation, we are moving up the learning curve and things are going a little easier and a little faster. For instance, we've decided to install windows as we go, while the crane is there in position to help us. Also we've found that it is advisable to check the width of the SIP tongues against the width of the SIP grooves before standing the jumbo (24') panels and trying to "slide/ratchet strap/pry" them together. I had always heard that polyurethane panels had looser tolerances than EPS panels due to the nature of their manufacturing processes. The polyurethane foam is injected between the OSB and allowed to cure in place whereas EPS foam slabs are premade and glued to the OSB. I committed to polyurethane panels (they insulate better and involve less waste at window openings) and never thought to care whether my walls were 1/8" thick or thin here or there, but now that we're trying to fit tongues-in-grooves, I'm realizing that I do care... at least when they don't fit! Our trick is to plane off 1/16" when the tongue is 1/8" too big, thereby converting an "interference fit" back to a proper "press fit". Before I leave this picture, I should point out that this is the west wall of our house, and therefore intentionally devoid of any large windows. The afternoon sun can get brutally hot and we didn't want to uncontrollably heat the house in the summer.
The top two pictures of the photo-collage reveal the inside of the house. The rightmost of these two pictures shows the kitchen wall, where the panel manufacturer has included electrical recepticles (and embedded conduit) for appliances. The leftmost of these two pictures shows my welder sitting in the sunroom. You can also make out the concrete forms for our fireplace slab - as yet to be poured. (look for the green rebar). Finally, in the lower left photo, you can see where panel-progress was held up until I finished welding some of the stainless-steel termite flashing - in a particularly difficult intersection of walls and posts. Yes, that's charcoal you see on the bottom of my post - I caught the post on fire a few times while welding. Thankfully, big chunks of wood really don't want to keep burning.
We are now working 7 days a week in a race to get these panels on and at least a temporary roof on the house before weather turns bad this fall.
posted by Thomas Massie at Saturday, September 09, 2006
![]()

0 Comments:
Post a Comment
<< Home