
SIPping along the south wall
 Short entry this (Saturday) evening...
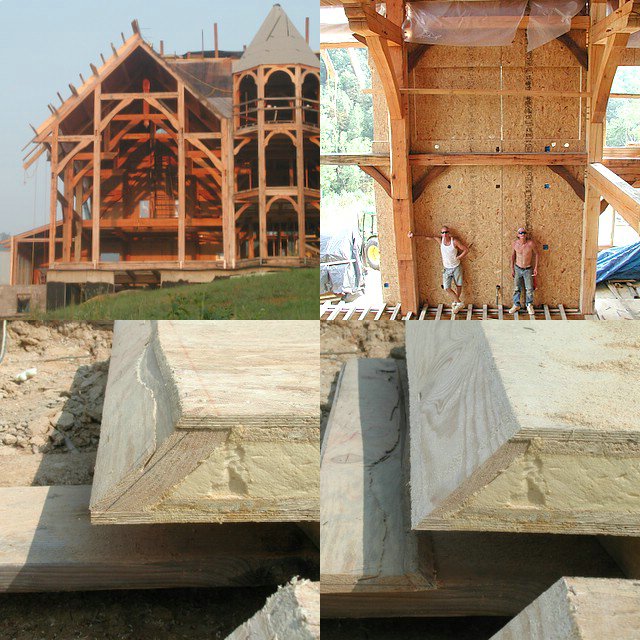
Upper left picture is the frame this morning at 7:45 am. With walls come shadows and I thought they looked neat so I snapped this picture.
Upper right picture is today's crew at beer thirty (consisting of one inlaw and one outlaw). Why does this picture look like a police line up? :)
Lower left picture is a "factory cut" SIP edge. I could have lived with the sloppiness, but the dang panel was too tall. This stems (mainly) from the fact that the SIP company dimensions the panels according to the inside edge of the inside piece of OSB, but then makes their bevel cut from the outside edge of the inside OSB. In other words, they don't start their bevel cut at the edge of the SIP. Result: if your OSB is 7/16" thick and your pitch is 12:12 (45 degrees) then your panels are automatically 7/16" taller than what you specified. Wish I had known this before ordering my panels. If you buy precut SIPs, make sure you know how your panel supplier will translate the drawings into real panels. Also try to get a feel for their tolerances, and shrink your dimensions by at least their tolerances.
Lower right picture is after we recut this panel edge with a 16" Makita beam saw. Looks like we'll have to cut nearly all of our top panel edges. Wouldn't be so bad, except for the fact that the top plates have staples (and sometimes #8 nails), which means that I've already trashed a $99 saw blade cutting these panels. Even though most of the top bevel cuts are sloppy (or plain wrong in two cases so far), to say something positive about the panels I should mention that all of the rough window openings, electrical boxes, and conduit seem to be spot on, and I'm glad not to have to do that work later.
posted by Thomas Massie at September 09, 2006
![]()
1 Comments:
Interesting. Those panels look familiar. Whom was the manufacture?
Post a Comment
<< Home