
(Built-Up) Roof update...
 We're almost ready (one week away?) to start slating the entire roof. Just to recap, on top of the timber frame are tongue and groove ceilings. On top of that is a vapor barrier. Then we have 2x10 rafters to create a space for the poly-iso insulation. On top of that are oak battens. And finally, slate. Here you can see the 2x10 rafters that create the insulation cavity (plus some air space above the insulation so the roof can vent properly). If I had it to do over, I think I would have made the entire 3rd floor of our house a simple attic space, instead of living space. I might have even forgone the timber frame trusses and used simple common rafters on 2 foot centers. It's been a lot of extra work to accomodate catherdral ceilings above this timber frame - almost like building the roof structure twice. I could have used SIPs for the roof (like I did the walls), but even though they would have gone on quicker, they would have been much more expensive and I still would have had to create some sort of batten system for nailing the slate. Oh well, too late to turn back now - I'm happy with the result - just frustrated that the "built up roof" is taking so long.
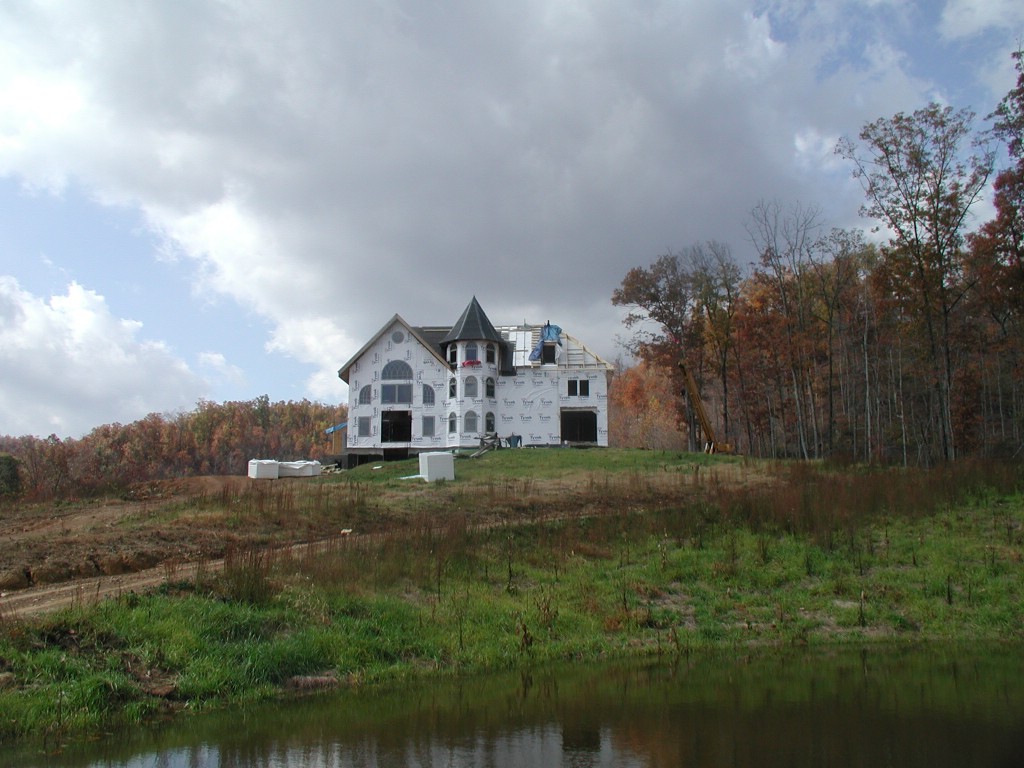 Here's a picture of the whole house as it stands now. There will be a dormer where the blue tarp hangs. The big hole in the front of the house (that looks big enough to drive a car through) is where a bay window will go. Actually, I'd call it a mini-turret, as it will extend 1.5 stories and be faced with stone. The 2 windows above the bay window will allow access (for only limber people!) to a small "castellated" balcony on top of the turret. The big white space (devoid of any windows) between this mini-turret and the main tower will eventually have an arched entryway that will frame the main entrance to the house. If I have any energy left at that point, I want to attempt building a "cruck frame" for this entryway.
posted by Thomas Massie at Saturday, October 28, 2006
![]()

5 Comments:
Wow !
It's coming along well Thomas.
I will be cutting down pines for my first project this winter. My roof design is principal rafters on 12' with common purlings at 4'. I'm planning on putting down 2x6 TG on top of that then as you did put down 2x12's to box in 10" EPS panels, finally I plan to use 2x4 battens screwed to the T&G to hold the insulation and nail the roofing to. Can I ask what has given you the most grief with the built up roof? Any advice would be appreciated also.
Thanks,
Marc.
Marc,
With a built up roof, time is the number 1 factor. After you put down your t&g ceilings, you are at the mercy of the weather and must work quickly to add ALL OTHER LAYERS of your roof or suffer damage to the t&g. I bit off way more than I could chew on the roof. In other words, I put down ALL of the tongue and groove for the entire house and have been trying to get it weather tight for weeks (no... months!) since then, with the prefinished tongue and groove suffering. I have a vapor barrier on top of the t&g and that helped shed the weather some, but caused as much problems as it solved as far as temporary roofing goes. Some of it disentegrated in the sun, showering my yard with shards of crumbly brittle plastic. In other places, the unavoidable nail holes here and there permitted water to get between the plastic and t&g, and the plastic held the moisture against the t&g, causing some of it to warp badly. SUGGESTION "be prepared for the battle, and bite off no more than you can chew."
Also, I'm left wondering, "gee I had purlins on 4 foot centers, and now I've added three more layers of wood (t&g, 2x10s, 1x4's) and months of time, just to get nailers on 2 foot centers." I've put a lot of lumber on my roof since the timber frame was done and, occasionally, it seems wasteful and time consuming.
ALTERNATIVE:
Now, the beauty of an attic with rafters on 2 foot centers, if I had done one (See Sobon's book for details), is that you can roof as soon as the frame is done. THEN go back and add your insulation (weather be damned, now you're in the dry baby!). If you want t&g ceilings, add those too (flat, on the ceiling below). Of course, you've traded the top floor living space for attic space, but who out there actually says they have "enough" storage space? And now you can annually inspect your roof from the below.
If the project is a smallish cabin or something, then a built up roof probably makes a whole lot of sense. IF it's something like the house I'm building, I'd just say... consider an attic - don't just assume, like I did, that all timber frames should have cathedral ceilings and that this finished space under the roof comes for free. Without a doubt, on a square footage basis, this "top floor under the roof" has been the most expensive living area in my house, and has extended the schedule by months, not days.
I like my house... no regrets... just saying I might have done it differently had I known how much work was involved. But then again, I probably wouldn't have even started the project if I really understood how much work was in front of me. But I'm sure glad I did start. :) sorry for the waffling!!!
PS, If you do go with a built up roof, Simpson Connectors makes L brackets brackets, part number LZ50 and LZ70 or somethign like that, which are great for attaching your 2x12's to your purlins. Check out your local home improvement store. USP also makes the same brackets for cheaper. I used well over 100 of these puppies.
Thanks for the reply Thomas.
I guess the built up roof is one of those areas that looks deceptively simple until you actually begin!
My project is somewhat large also, but I'm tackling it in two phases. Phase 1 is to build a workshop (28 x 48) which will serve as a prototype so to speak. Being much simpler than the house, no dormers, hips, or valleys it will serve as a reality check to see what I'm up against building the house.
It will then serve it's purpose by providing me with a workshop to build the house in.
I may heed your advise and re-think my roof now.
Sure makes a good case for SIP's!
Should be much faster to put up and close in.
I'll be setting up a blog of my own soon, so I can share my experiences (and grief I'm sure) as you did.
Marc.
Marc,
Your two stage plan sounds brilliant. Especially since stage 1 involves no hips or dormers (Which is what sucks up your time and energy).
Yes, SIPs would have been much quicker on the roof. But I would not span more than 4' with SIPs. In the short time they were staged in my yard, the SIPs bowed a little because we had the stickers 8 or 10 feet apart. OF course they recommend SIPs thicker than 4" for a roof, but still, I would not span more than 4 feet. You mentioned using purlins on 4' centers - that would be fine.
BTW, standing seam metal is an ultrafast way to get dried in, and a big step up (in aesthetics and reliability) from the typical crimped "V" metal roofing used on a lot of houses, barns, and workshops around here. (typical metal roofing has screws going through the metal, whereas standing seam does not). SIPs with standing seam metal would be a good combination. SIPs with slate is a much bigger stretch.
Let us know your blog address when you get it started!
-Thomas
PS, we slated all day today. I am worn out, and still learning about hip joints!
Your house has that very dramatic look, and the woods add to the mysterious touch of the photo. You can easily view the countryside from the high window, which makes it very romantic for couples.
Post a Comment
<< Home