
Installing and Flashing Slate Hips - up close
There are at least 6 ways to install slate at hip roof junctures. I chose a method called "Mitered" hips because it looks to be the most watertight and most durable. Although there are definitely fancier methods, my wife and I found the aesthetics of this method to be "agreeable." (See the slate books for examples of "Boston" or "Fantail"). Until the day I started slating these hips, I was convinced that copper flashing on top of the hips would be the most water tight, but when I got on the roof and started nailing slate (in the rain!) I speculated that water might run along the edges of the slates, under the copper flashing, and into the hip seam, so I chickened out of copper hips at the last minute. In fact, I already had three courses done that way before changing my mind! Back to Mitered hips:
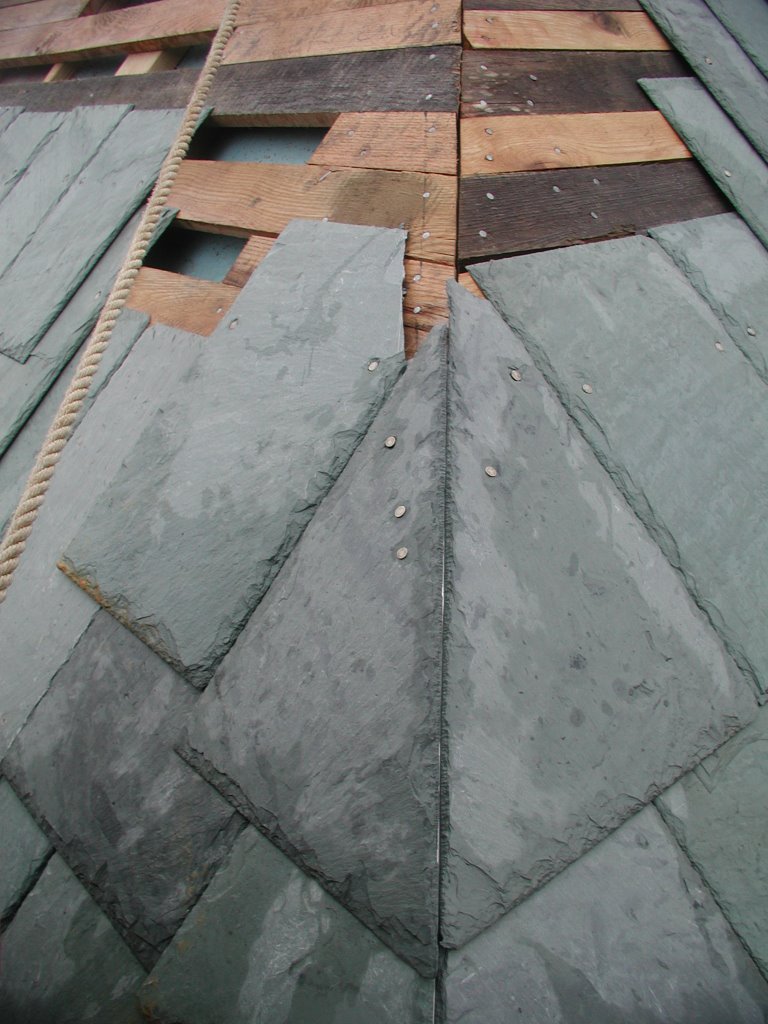
 Some things to notice in this first picture...
*the roof is sheeted solid with wood here at the hip by filling in between the skip sheeting. This allows for needed variances in nail placement.
*I cut the corner off of the green rectangular slate to the left of the hip. This allowed me to nail the hip slate of the next course without nailing through (and possibly breaking) this otherwise rectangular slate. BTW, when is it necessary to nail through an underlying slate (and it inevitably is), it's best to drill a hole through that slate rather than trying to nail through it.
*Nail holes in the hip slates are ad hoc, but must remain up stream of the flashing that will cover them. With that in mind, the further apart the nail holes are, the better, as the nails will help keep the hip slate from rotating. Should either the right slate or the left slate rotate, the hip seam will open up and reveal the stainless steel flashing beneath. (yuck) Another way way to prevent this is to make sure that rectangular field slate abutting the hip slate fits tightly against the hip slate.
 This second picture shows the stainless flashing that I used. The flashing need not look like this. In fact, normally you would use a square piece of metal, bent from one point to the next point. This was some flashing that I had already made up that was bent down the middle instead of point-to-point. I cut the corners off of it to make it look and function more like point-to-point flashing.
The style of slating on this roof is called "staggered butts, random width" which provides some leeway and simplifies these hip joints. I can have someone precut the hip slates (all the same dimensions) and hand them out to me, then I can vary the width of the adjacent field slate to blend in with the rest of the roof. Also, at the hips, I've chosen to lower the butts of the slates so I can run the flashing a little longer.
"The Slate Book" is full of useful information that helped me through this installation, but they recommend "modified bitumen" as an alternative flashing material (instead of stainless steel or copper). I can see how it would go on easier and lay flatter, but its lifespan (10? 25? 40 years?) seems almost "temporary" compared to the lifespan of slate. The "Slate Roof Bible" recommends more durable flashing, possible because that book's author has replaced flashing on slate roofs that were otherwise in great shape. I want this roof to outlast me, so I'm using stainless.
 The third picture looks almost identical to the second picture, but closer examination will reveal that this is the next course of slate and flashing laid upon the previous course of slate and flashing. In fact, if you look at the seem where the two hip slates meet, you can see a difference in how the hip slates come together. In the previous course, I cut the slates from the back side, revealing the textured bevelled edge on the face of the hip slates. In this course, I cut the slates from the front side (one slate book recommends to do this to get a tighter fit.) The book is right, you can get a tighter fit, but I'm not sure i'ts worth the extra trouble. The tips of the slates tend to break off more frequently when you cut them from the front (i.e. cut them with a reverse bevel).
posted by Thomas Massie at Wednesday, November 01, 2006
![]()

2 Comments:
Thomas,
The mitered hips look fantastic. I agree, flashing the exterior of the hip on a roof with this pitch would not look as nice as what you are doing. Good on ya, mate!
BTW, to accomplish "double nailing", you do not have to drill the hole in the lower slate. I ahve found that a sharp 1/8" or smaller steel punch makes a perfect, clean hole for the shank of the nail. I have done this repeatedly at the ridge of my roof where I have to double nail the last course of partials and to nail the copper ridge roll.
Thanks for the helpful tip Jim! I will give it a try. I've had to double nail those ridge slates too. On these first few hip slates, I've had stainless sanwiched between the upper and lower slate. Punching the lower slate or the stainless is possible, but when you put the two of them together, it's tough to do w/o a drill. (and even then, I get about 10 holes per bit, due to the stainless!) I need to use smaller pieces of stainless flashing (which I should have by tomorrow) so that I can try punching through that lower slate. Today it is raining and I refuse to work in the cold rain two days in a row. :)
Post a Comment
<< Home