
Copper flashing for south dormer
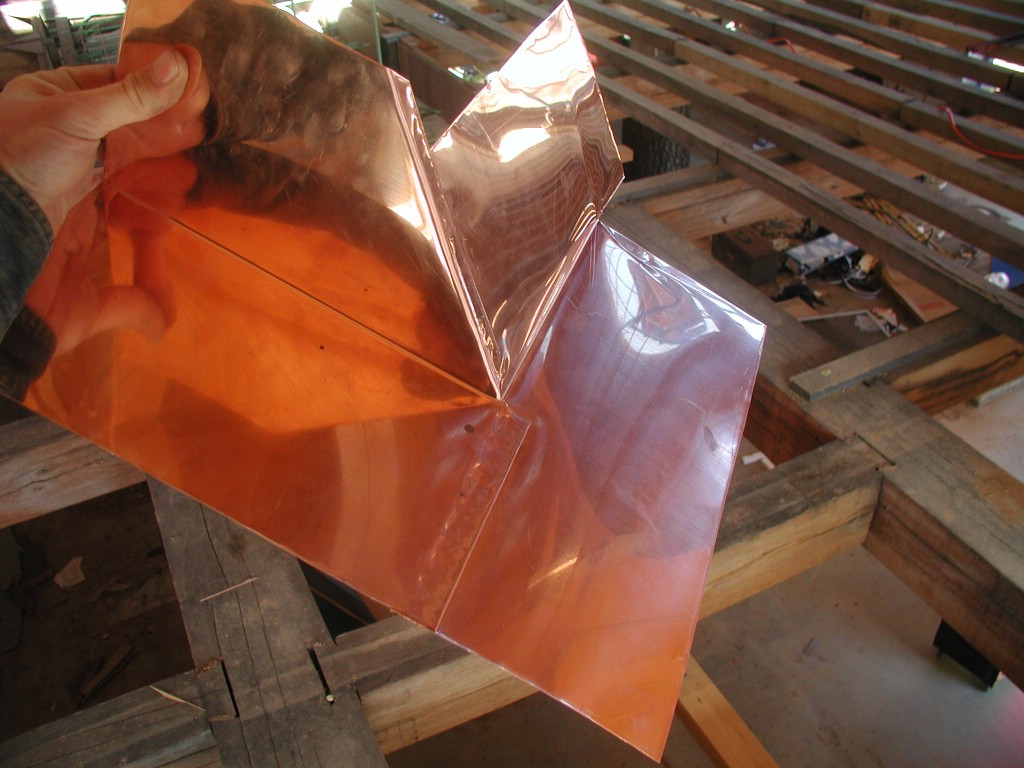 There were four of us working on the house today. I worked on several pieces of flashing, while the other three started wiring (more on that later!) the house. I'm finally starting to learn how to do this flashing thing... I think. The trick, I was recently told by an expert roofer, is to fold and crimp two pieces of copper together before you try to solder them. The resulting solder joint will be much stronger. The picture to the left shows a piece of flashing that I fabricated today. Even though the joints are not yet soldered in this picture, you would not, using your bare hands, be able to seperate the pieces of copper that make up this flashing. That's because the seams are folded and pounded flat with a hammer. This makes a very strong joint. More importantly, it keeps the pieces from falling apart while you're trying to solder them.
 This next picture shows my ultra-sophisticated soldering iron. Maybe you've seen one of these in an antique shop. I think I used to have one laying in a barn here on my farm - but I never took it seriously as a means for soldering anything. (The college student that occasionally helps out says his mom uses one of these to plant flower bulbs!) Before turning to this crusty technology, I tried an electric soldering iron, a butane powered soldering iron, and a propane torch - none of which were adequate for the job. Credit card in hand, I stared down a $400 soldering outfit on the internet, but decided that was too pricey (for something I hope I'll never have to do again!). I bought this iron new (yes, they still make them in Germany!) for $20. The propane tank is from my barbeque grill, and the burner is from an outdoor deep fryer. You put the iron in the fire until it gets hot, then you pull it out and solder with it until it gets too cool. It's that simple, and it works great. Contrary to what I've been told, I believe that I do not have enough irons in the fire. :) Seriously, I plan to buy (or find?!) another one of these irons so one can be heating while I'm soldering with the other iron.
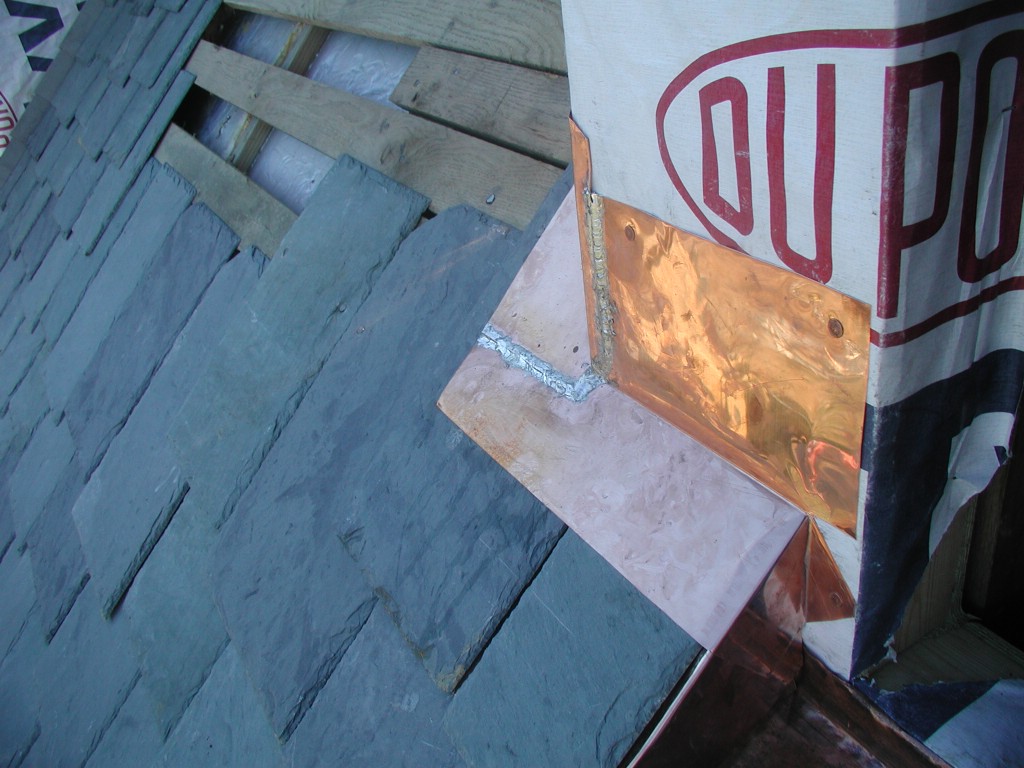 The steps in soldering are (sorry, very briefly!): apply flux to copper, "tin" your copper joint with a thin coat of solder, apply enough heat and solder until solder "sweats" into the joint, "stitch" a bead of solder across the joint, wash flush from copper with water and baking soda. Seems to be working for me - but if anyone has any more suggestions or tips, please comment! Here's the finished piece, nailed with copper nails to the house. Sadly, the next course of slate, and the siding for the house will cover up 80% of this piece of copper. Hopefully it will shed water though for as long as I'm alive.
posted by Thomas Massie at Wednesday, November 22, 2006
![]()

2 Comments:
Tom:
The house is looking great!!
I to have started a blog on the building of our timberframe home project. http://timber-frame-home-project.blogspot.com/
We have also thought about going with solar electric. And although recouping the cost is secondary to me, the cost is still a real factor. My thoughts right now are to see how the budget on the house plays out and decide if we do it right away or wait a while.
I have spoken with Shawn Camara of Camara slate and also received some samples from him. We really like the look and would sure like to use slate as well. Here again costs is a factor, so my current plans are to apply Water and Ice shield to get us by for the Winter and also to buy us a little time to make our decision.
Again I really enjoy your posts, and keep up the good work. Have a Happy Thanksgiving!!!
Rob
Rob,
Your blog is looking great. I wasn't blogging when we poured our basement walls, so I don't have many entries regarding the foundation. Maybe some day I will go back and blog about the Symon panels and pouring walls. Your foundation/radiant heat descriptions and pictures are great. I can't wait to see your frame go up (but probably not as much as you!)
Good idea getting some kind of fast temporary roof on your house. Your SIP roof will go on fast. I was not as prepared as you are, and I am going to have to reclean a lot of timbers. I love our slate, but standing seam metal is a great choice too. The metal will go on 10 times faster, and that is _no_ exageration. I used standing seam metal where my solar panels will go. Standing seam metal (materials) is not much cheaper than the slate, but the labor for installing slate will be much higher (unless you do it yourself). But if there is a prettier roofing material than textured Vermont grey-green slate, I have not seen it.
I am amazed at the pace of your project, and at the cleanliness of your job site. Even if you do everything on time, it's hard to coordinate your suppliers. I have had supplier delays, but unless they just plain aren't trying, I don't give anyone a bad review on the blog... the folks who did my SIPs are one big exception. They were just plain miserable at giving a date and sticking to it and at some point they stopped trying to be serious. Keep up the good work. Blogging can be habit forming - stick with it long enough to get in the habit, if you aren't already!
I'll post this comment on your blog too!
-Oldmilwaukee
Post a Comment
<< Home