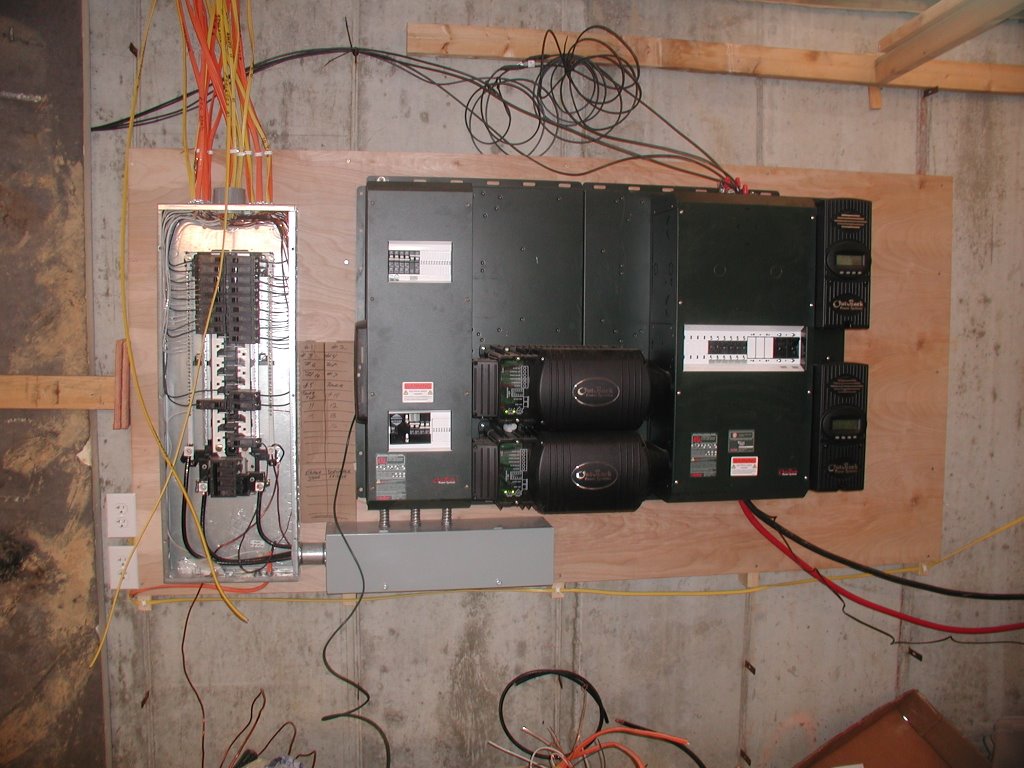
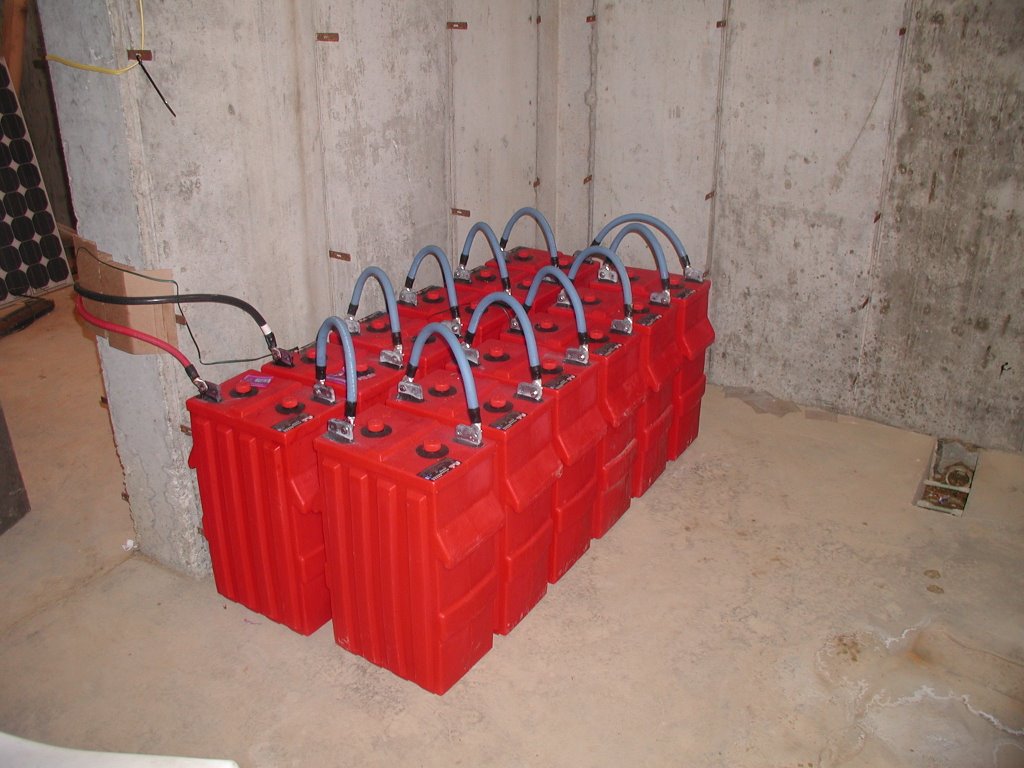
Wednesday, with 3 solar panels mounted to the roof, most of the circuits pulled into the main breaker box, and the inverter station wired to the breaker box, I realized that we could test out the entire power center for the house, if only I had the batteries on site and wired. I drove the backhoe to my workshop where the batteries were stored and brought them up to the house site. We wired them in a temporary location in the basement and ran the heavy 0000 ("four ot") gauge cables to the inverter panel. We had been backfeeding the breaker box with a honda generator, so we were careful to disconnect the generator from the "mains." Of course, our flourescent lighting went out as soon as we took the generator down. But then I threw the DC switch that connects the batteries to the "Master" inverter. LEDs flickered, Red, yellow, green, two greens, go! The inverter's cooling fan came on momentarily and then spun back down and everything seemed happy,

so I threw the switch to the second "Slave" inverter. It performed exactly the same dance of lights and fan noises but settled into a blinking green LED state, because it was waiting in standby-mode for the power consuumption to warrant its active participation. Satisfied that everything was happy and dying of anticipation (sorry, I should clarify... the inverters were happy, and I was dying), I threw the switch that connects the inverters to the house's breaker box. The lights came back on! We were running on battery power! Not exactly solar power, but an important first step.
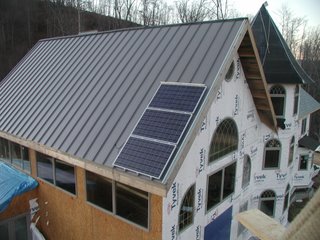
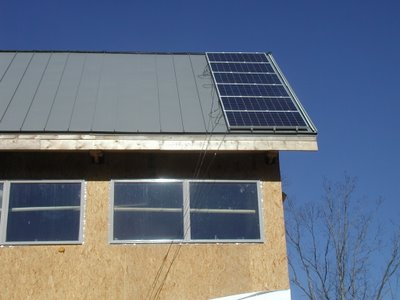
Quickly I ran outside and warmed up the crane. I thought I could temporarily wire the solar panels before it got dark... it wouldn't look pretty but it should work for testing purposes. My bro-in-law flew me up to the roof on the end of the crane and I wired 3 panels in series, made a make-shift strain-relief
, and dropped the two leads back to the ground. When I got back to the ground, I shut the system back off and wired the solar leads to the MX-60 MPPT. (yes I know, there are supposed to be DC circuit breakers, lightning arrestors, conduit, and a chassis ground in this part of the story, but those will come soon, I promise) Satisfied that I had the polarity correct, I powered the inverters back up, and then turned on the MPPT. It woke up with a fancy display on its lcd screen, but then pronounced it was "snoozing". Snoozing?!?! At a time like this, how could it just sit there and snooze?! I looked outside and saw that the sun had set behind the hills... but surely there was enough light left to keep this thing from snoozing?! I started jumping through the menus on the MX60's display - aha there it was... a way to lower the current threshold so my MX60 wouldn't snooze in low light levels. But the system asked for my password and, defeated but not broken, I decided it was time to RTFM. There it was, on page B.26 the factory default password! By the time I got the password in the system and lower the cut-in threshold, the MX60 declared that it was now "Sleeping!" It was now dark outside... my window of opportunity had passed and I would have to wait one more day to "Go Solar."
Thursday started out cloudy, and then turned to snowy. With snow accumulating on the panels, it seemed like there was no hope of "going solar." Much to my surprise, the MX60 decided to wake up and started serving 5.... 10.... 15 watts of power to the batteries. Soon, it was reading 200 watts, even with snow on the panels. That did it, I pulled all of the generator wiring from the breaker box and decided that we were now "Solar!" Of course, I got little done that day - I couldn't take my eyes off of the status display on the MX 60. Every 5 minutes, I would run down to the basement and see how many watts we were producing and check our battery voltage. Before the end of the day, we registered a high of 400 watts from the 624 rated-watt panels. In fact, due to meager use of power tools and flourescent lighting, we finished the day with almost as much energy in our batteries as when we started!
Friday, the sky was clear for much of the day and we produced a whopping 1.7 Kwhrs by 2:00 pm - which was again enough to meet our power needs without ever turning on the generator. Bouyed by the success, and addicted to solar power, I decided to connect 3 more panels for a total of 6. (when in fact, what I really should be doing is working on the permanent installation of all of the panels, or the flashing for that slate roof.) We brought the second set of panels on-line at about 3:45pm - just in time to see 300+ watts from each set of 3 panels.
We didn't work today (Saturday), but I
had to visit the house site and see how the panels were performing. Each set of panels was producing approximately 540 watts of power - almost 90% of their best case rating and the 48 volt batteries were at 54 volts! So, even though they're not permanently wired, these panels are permanently mounted. Eventually, I will cover the entire south roof with 48 solar panels, for a total electricity generating capacity of 10,000 watts in the noon sun. But for now I think we have enough electricity to run all of our tools.

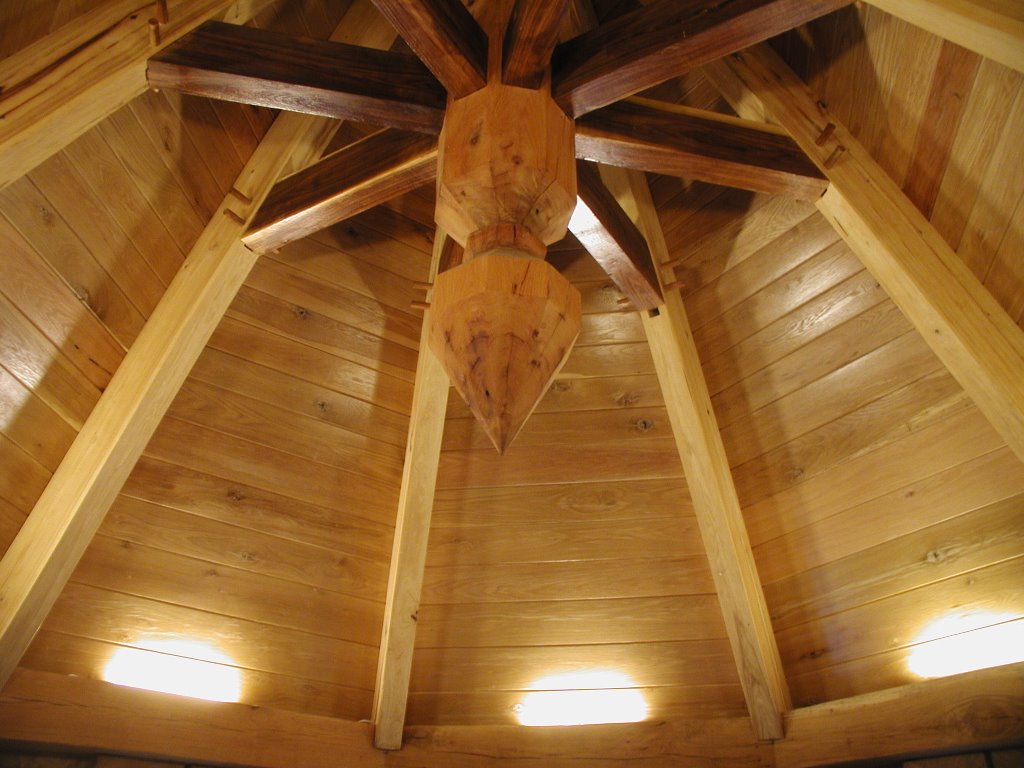
 With the weather outside turning nasty, and the roof almost finished, we've turned out attention to hanging the drywall on the inside of the house. Like everything else, this is turning out to be a bigger job than I had imagined. The biggest time sink is cleaning (with bleach and/or sand paper) all of the weathered timbers inside the house. I'm not bothering to oil or finish the timbers at this point, because the mud-tape-sanding of the drywall is going to generate a lot of dust that could stick to the linseed oil. When we're completely done with the drywall, we'll go back and oil the timbers (hopefully one last time!).
 There is a fairly standard trick to hanging drywall in a timber frame house: When you install the SIPs, you hold them away from the timbers using 5/8" strips of wood or plywood. This gives you ample room later to slide a piece of 1/2" dry wall behind the timbers and knee braces. As the timbers and braces shrink, they simply expose more of the drywall. The alternative would be to fasten the SIPs directly against the timbers, but then you would have to butt your drywall up to the timbers and cut drywall to fit around the braces - not desirable, especially since these timbers are still shrinking! Here's a picture that illustrates the intentional gap we left between the SIPs and timbers.