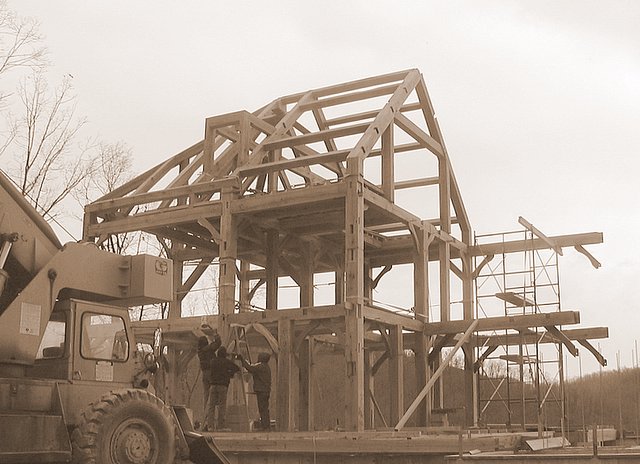
It took two days to assemble the hip portion of the house. This assembly (8 jack rafters and 2 hip rafters tying into the hip king post, three top plates, and two hip queen posts) was never trial fitted as one assembly on the ground, but it ultimately worked up in the air where it counts. Here's how we assembled each corner of the hip roof....
1. fly the hip rafter in to place
2. fly the associated 4 jack rafters, upper ends resting on hip rafter
3. fly the queen post in to place (after cutting to length)
4. re-rig the hip rafter with crane straps
5. nail boards on top plates to keep jack rafter feet from sliding off top plates
6. lift uppper end of hip rafter about 8 inches
7. get upper ends of four jack rafters to fall into place
8. lower hip rafter back into king post
9. guide queen post in as hip rafter lowers back into king post.
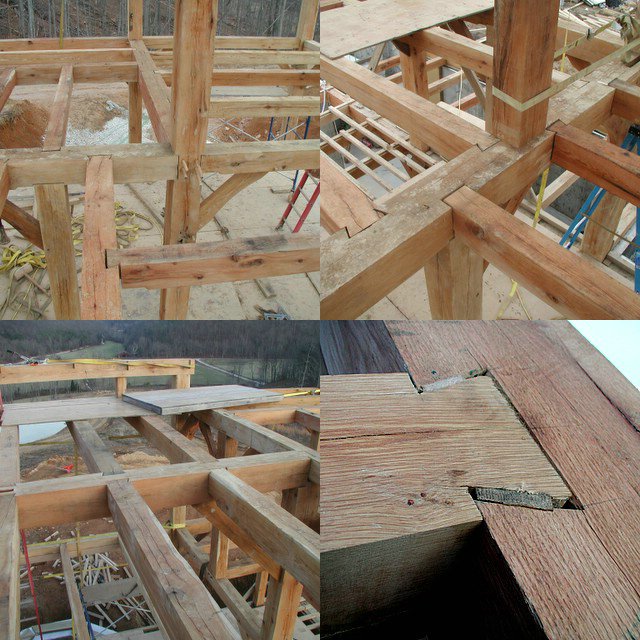
The North-East hip rafter fit like a glove, but the South-East hip rafter appeared to be 1" short when we placed it. We thought "oh crap!" because it wasn't 7/8ths short or 1 1/8" short - it was exactly 1" short, which pointed to a cutting error or layout error (which would have meant the SE hip rafter was destined to be firewood). But after tweaking the two principal rafters and king post (they were out of plumb), tweaking the NE hip rafter some, and shimming the foot of the SE hip rafter 1/4", everything came together fine, as you can see in the picture looking at the king post. Of the 1 principal rafter, 2 hip rafters, and 8 jack rafters that form the hip portion of this house, only the upper ends of the 2 hip rafters have been pegged in this picture. Everything else is pretty much being held in by gravity.
[you should skip the next paragraph unless interested in compound joinery!]
This was a very rewarding piece of the frame to put together. Several months earlier, it had taken me 2 weeks just to calculate and draw the hip rafters, jack rafters, and king post. Even though this seemed like a very straightforward problem before getting into it, calculating the angles and translating them into 1/16ths of an inch dimensions that could be laid out timbers was... maddening. There was precious little in the timberframing books and literature that showed how to do this. The one gem that I found was a spreadsheet on the tfg guild web site, but even it was hard to decipher. (you input the various angles of your roof and it spits out two dozen angles - it's up to you to figure out which 3 of these two dozen angles is important to you!) If I ever build a timberframe hip roof again, I'll use the exact same dimensions and angles as I did for this house! I think I would also use a king post again at the top to tie everything together, even though I have only found one other example in the literature of executing a hip roof this way (which I found only after I had designed it this way!) When I found the king post example (in the "Taunton press compilation of fine homebuilding articles on timberframing"), I was somewhat comforted that it had been done this way at least once before (although their example did not use a mortise and tenon joint between the hip rafters and king post - their hip rafters merely rested against, or leaned into, the joint formed between the principal rafters.) Also, a lightbulb went on when I saw how they handled the foot of the hip rafter - they used a "dragon beam" (a beam resting on both top plates) to support the foot of the hip rafter. That makes more sense than the way that I did it - I have the foot of my hip rafter recessed into (and resting on) the two top plates join at the corner. My version makes for some unecessarily complicated joinery there, and even then I was uncomftable enough to use the only metal fastener in the house so far - the stainless all-thread which I thought might be needed to keep the foot of the hip rafter from spreading the two top plates apart at their joint.

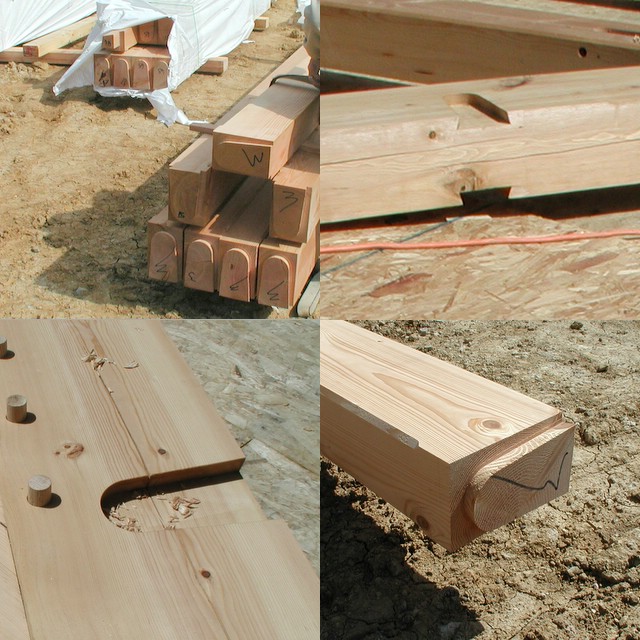
 We used scaffolding to suspend 3 of the 6 girts that will connect Bent C to Bent D. We've decided to raise Bent D in two sections, and at this point we only need 3 of the girts in place in order to raise the first section of Bent D. We've found that the 3/4" steel nail pins that I bought for the concrete form work are very handy for temporarily pegging braces. After assembly we remove these pegs and drive octagonal 1" locust or white oak pegs.