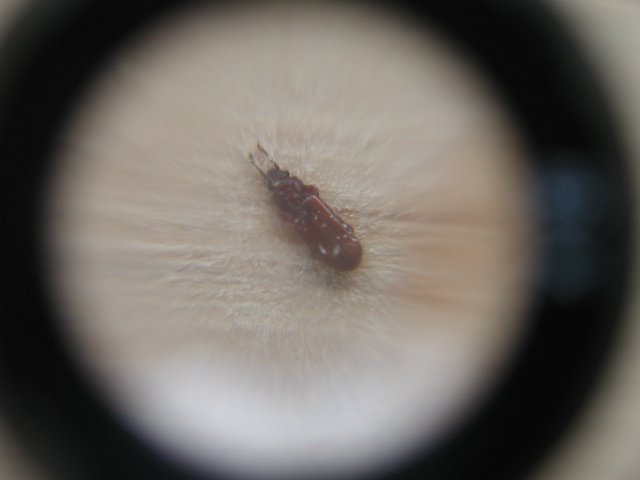
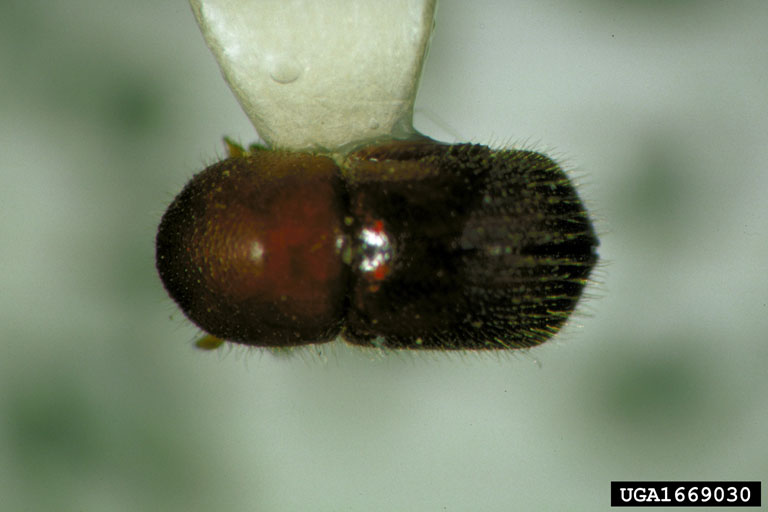
After chosing the exact location for our house, we decided to remove four trees that could potentially damage the house if they ever fell over. I had special plans for the most beatiful tree... a northern red oak. But much to my horror, less than 100 feet from our house, inside the trunk of this otherwise sound oak tree, we exposed a thriving termite colony. (The first functioning termite colony I'd ever seen)

Needless to say, this got my attention - somehow our house would need to be protected from these hideous creatures. Because I had built a pond downstream of our house site, poisoning the soil around our house as a means of temporarily fending off termites was not a viable option. (although many people still insist that I should poison all of the ground around my house!) In the course of pouring through various drawings of foundation details, I came across a mechanical termite shield. The concept sounds simple... a continuous metal flashing that seperates the wood of your house from the soil and foundation beneath it.
Of course termites can and do fly, but the flashing supposedly exploits the termite's basic need to return to the earth (for water? to breed?). Of course, termites could probably traverse the metal flashing, but when they do, they do it within mud tunnels, to avoid exposure (to the sun? to light?). So long as the entire perimeter of the flashing is visibly exposed to the homeowner, a periodic inspection will reveal any "breaches in the security system" and the homeowner can engage the termites at the appropriate location before they can inflict extensive damage.
In the course of trying to incorporate this seemingly elegant solution into my foundation details, I found out why it is not widely used... it's anything but elegant to implement!!! The first bad news is that steel and aluminum are not recommended as flashing material because they corrode (via galvanic reaction) in the presence of the copper compounds found in all pressure treated wood. Copper and stainless are said to be appropriate materials (although copper can corrode in the presence of some types of concrete, and stainless must technically be passivated stainless in order to be compatible.) I chose stainless because I felt more comfortable welding stainless than soldering copper (bad assumption!?), I think it has the potential to last longer than copper (although both should outlast me), and I could not (at the time) visualize how to pass the (steel) foundation anchors through copper termite flashing to the timbers and maintain a seal that would not corrode itself.
My mental model of termite flashing is analogous to a prophylactic... in other words, if you can't get 100% coverage, then why bother, because it only takes one hole for the termites to gain entry to your house. Some foundation details that I've seen of termite flashings implement them more like insulation - in other words, some is better than nothing and 100% coverage is not necessary. Perhaps I should have adopted the "insulation model" instead of the "prophylactic model" of how this flashing works - it surely would have made my life a lot easier as regards termite flashing. But I just can't see how you can expect an termite (that can travel over 100 feet underground) not to find a hole in the flashing.
Details and thoughts:
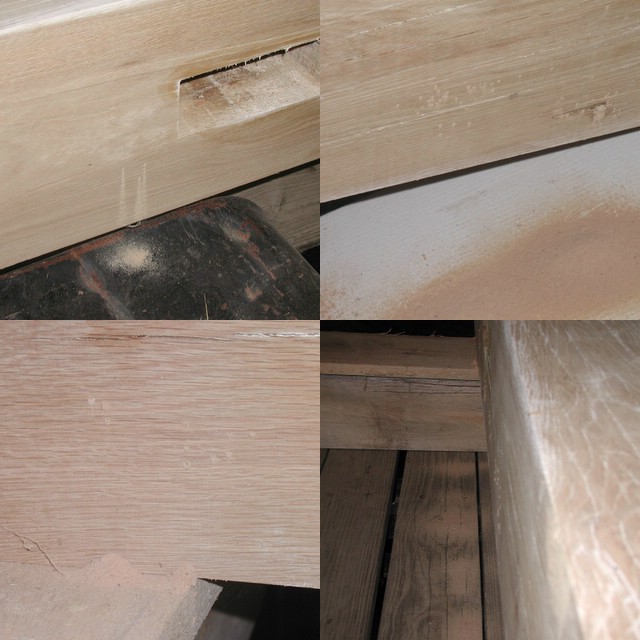
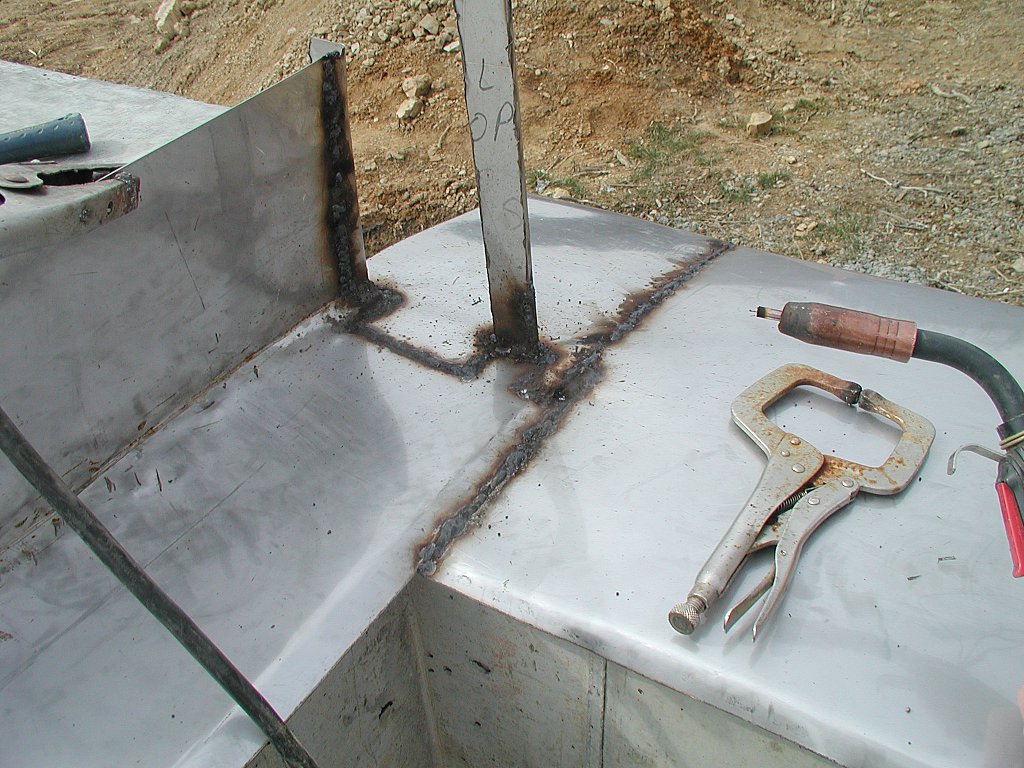
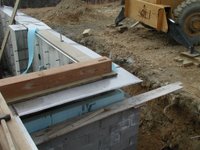
1. My post-to-foundation anchors are homemade stainless steel straps that were poured 16+ inches into the concrete walls and hook under the topmost course of rebar within the concrete. Because the straps were stainless and the flashing was stainless, I was able to weld the seams everywhere the straps passed through the flashing.
2. I began with 24 gauge stainless because I thought it would be easy to work (not really - you can't bend it in a brake made for aluminum flashing - I tried and failed), I thought it would be plenty strong (true), it cost about the same as copper, and I thought I could reasonably weld it (wrong).
3. I switched to 18 gauge after the 24 gauge ran out, and the 18 gauge was 100 times easier to weld, maybe only twice as hard to work, and almost twice as expensive. Welding 18 gauge to 24 gauge was tolerable but tedious. This is what I did in order to use up the last of my 24 gauge stainless.
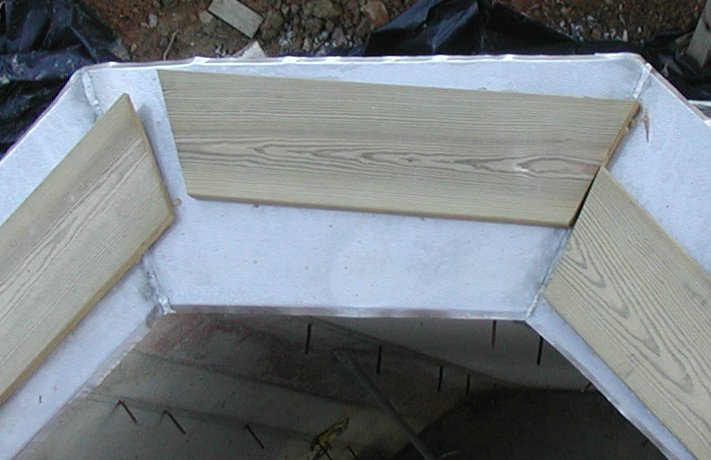
4. Don't forget to cap the plinths that your basement posts sit on. Termites can otherwise pass unseen through cracks in your slab right into the bottom of the posts.
5. With a Lincoln 255 MIG welder, these settings worked well for 18 gauge stainless:
.030 diameter, 308 alloy, 17 volts, 210 ipm, 25 cfh pure argon.

6. You can solder stainless, but I wouldn't advise it - Soldering stainless is more tedious than welding 24 gauge stainless. You can see in this picture though that I was able to do it (out of desperation - but then I went back to welding!). If you decide to try and solder stainless, be sure to neutralize the flux as most flux is corrosive to stainless. (I used baking soda)
7. Consider copper. My friend did, and he had much much much much less trouble than I on his cabin.
timberframe with copper termite flashing Copper looks nicer too. I suppose you could use stainless post-to-foundation anchor straps and solder the joints. (not sure if stainless to copper solder connnections are viable though.) Alternatively, you could dispense with post anchor straps, and use stainless allthread to anchor your timber sill to the foundation, then use stainless washers where the allthread passes through your copper flashing. (my friend went this route, but didn't use stainless steel.)
8. I don't know what to say about finished basements... I haven't exactly figured that out myself for my own basement. I have yet to find a detail in any book of how to implement termite flashing in a finished basement (or slab on grade for that matter). The rub being... how to keep termites from travelling vertically through interior partions in the basement. For now, I have resolved to keep interior basement partion walls to a minimum, flash all interior basement partion walls, and not to fir out the interiors of the poured walls.
9. Try not to use a steel brush or hammer on your stainless. This will possibly impart tiny pieces of non-stainless steel that will keep the stainless from passivating itself. Your stainless will then rust or pit in these locations. (I have already seen it happen on my stainless)
 Summary:
 Termite flashings are academic solutions, best suited for houses built over crawl spaces. I doubt the folks that recommend them in print actually have one on their house, and if they do, I doubt it is implemented in a comprehensive or foolproof way. Nevertheless, I found it to be the most believable non-poison means of protecting my house from termites. I wanted to try something. If it works, it should last more than 100 years and be cheaper in the long run than periodically poisoning the soil around the house. If you try it, think seriously about copper instead of stainless. If you don't use a termite flashing, take comfort in the fact that I have 4 barns, each 50 years old, all in fine shape, sitting on nothing but dry-laid stone piers.

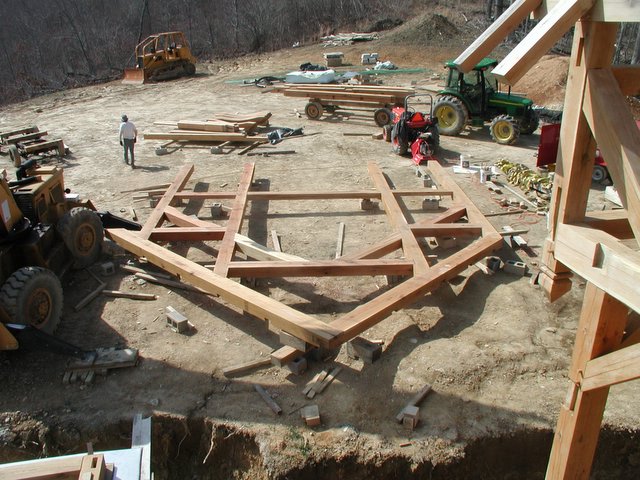
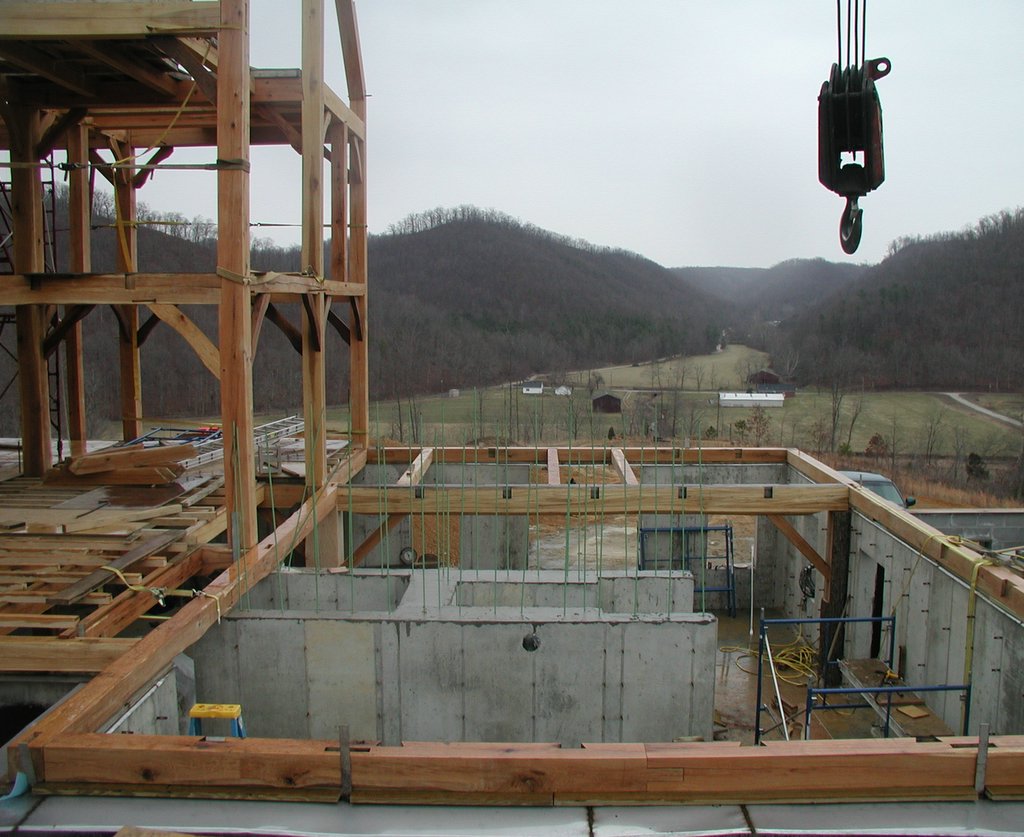
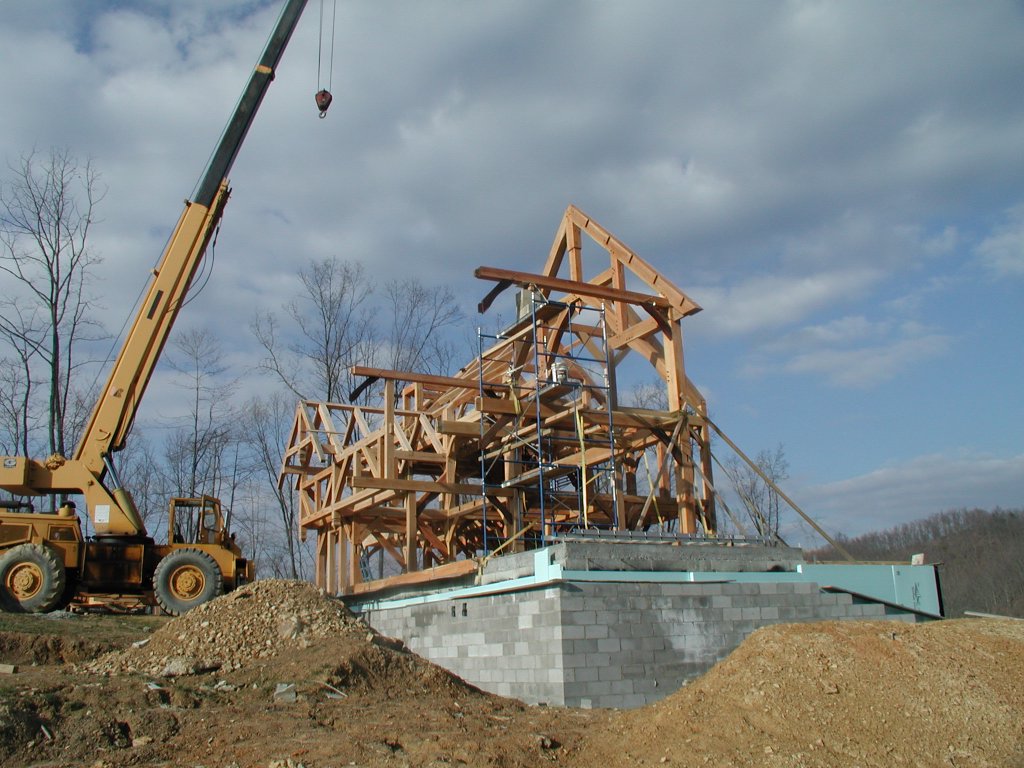 After raising the first hammerbeam day-before-yesterday, yesterday we prepared everything in order to raise the gable bent (Bent H if you will) that forms the exterior wall of the kitchen. At about 3:00 we were ready to raise bent H, and with about 4 hours of daylight remaining, we decided to go for it. (There is much to do in order to be ready to raise a bent - for instance, all of the connecting girts and braces must be in place, as shown in the first picture).
 Yes, the bent went up. We rigged it as I had seen in photographs, but it didn't fly like we wanted. The knots on the chokers slipped, and once we lifted it, the bent was tilted the wrong way (feet out, not feet in) and this caused us much grief, but we did not want to set the bent down and re-rig it, because it is a very scarey thing to raise a 32 foot tall bent from 0 degrees (horizontal) to 90 degrees (vertical). It was a long day - but once you have a bent 90% raised, you don't quit. By dark, we had the feet of the bent in place, and all of the girts and braces started. We "ratchet-strapped" and "come-alonged" the bent toward the standing hammerbeam bent and resolved to pull everything tight the next morning.
 This was the view this morning - what a great surprise to see what we had finished in the dark the day before. This morning, we flew in about 9 purlins inside of 3 hours, so by 11:00 am, everything looked different. (This included taking time to cut a missing dovetail joint to frame around the chimeny opening.)
  There were several more timbers to fly in to the frame after the purlins to bent H were finished. These extra timbers were the ones that form the "shed roof" portion of the house - seen from the back of the house. My friend in this picture is an ex-union-iron-worker, who scampers on these timbers like a squirrel. Although you can't see it in the picture (and he thinks he doesn't need it), he is wearing a safety harness.
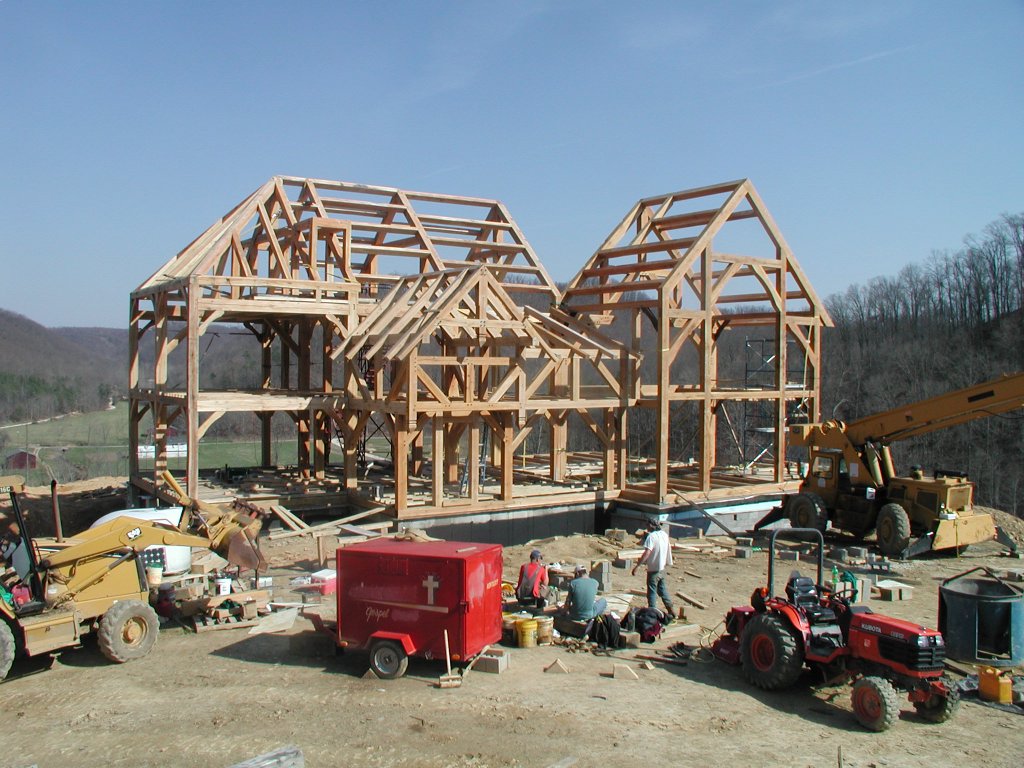 Here's a view of the back of the house as it stands this evening. You can see that not only have we framed the (kitchen) bay between bent G and Bent H, but we have also framed the shed area between the "gable overhang" and the bentG-bentH bay. Beer-thirty arrived early today (3:30) since it happend to be at 7:30 yesterday! You can't work like borrowed mules everyday.